Are you ready to dive into the vibrant world of neon coral nails? What makes this color so irresistibly striking? And how can you incorporate these bold, playful vibes into your own manicure repertoire? Whether you’re looking for a dazzling summer polish, a bright statement piece, or just a way to liven up your nail routine, neon coral has something spectacular to offer. Today, we’re exploring various manicure designs that not only showcase this electrifying hue but also integrate elements like glitter, French tips, and artistic designs. Get ready to discover your next nail crush!
Neon coral with a twist
Neon coral nails are not just a statement; They are a proclamation of joy and style. The vibrant hue perfectly captures the essence of summer design, colors and ideas. The use of acrylic enhances the shine, making the color stand out even more against the skin. These nails are bold, simple yet eye-catching and offer a fun and cute appeal that is hard to miss.
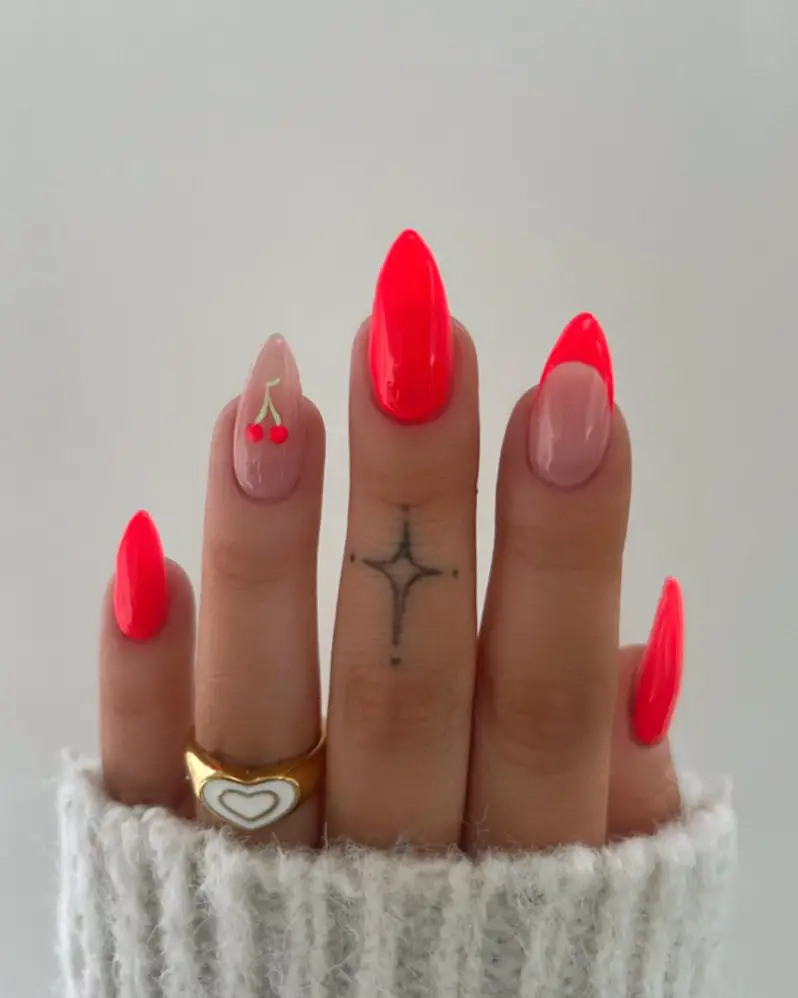
Photo credit by: @charsgelnails_
- Base Coat: OPI Natural Nail Base Coat
- Polish: DND Coral Neon
- Top Layer: Seche Vite Dry Fast Top Layer
- For those looking for extra sparkle, a touch of glitter polish can enhance the look.
Start with a clean, prepped nail. Apply a base coat to protect your nail and improve the durability of the acrylic. Once dry, apply two coats of DND Neon Coral, allowing each coat to dry completely. If desired, add a light coat of glitter polish for a sparkly finish. Seal everything with a top coat for a shiny, long-lasting manicure.
sophisticated coral
Neon coral nails are elevated a bit with the addition of rhinestones. This design combines the vibrancy of neon coral with the elegance of crystal embellishments, creating a perfect balance between fun and sophistication. The long nail shape allows more surface area for the intricacies of the design, making this style ideal for special occasions or simply adding a little glamor to your everyday life.
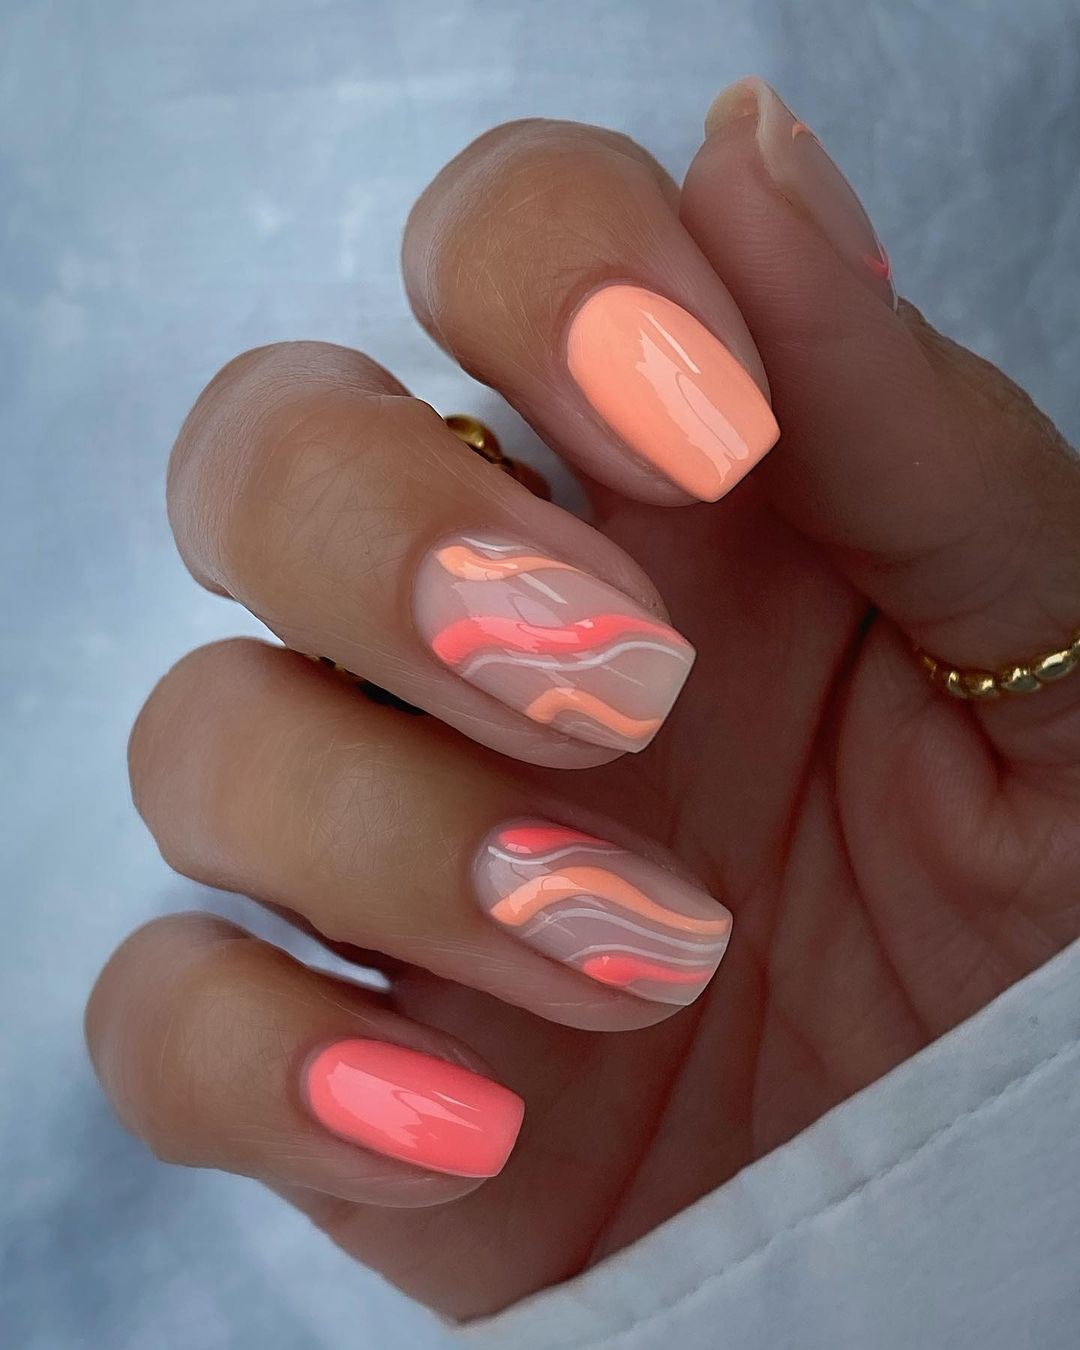 Photo credit by: @lindseysbeautylounge1
- Base Coat: Essie Here to Stay Base Coat
- Polish: OPI Neon Coral
- Rhinestones: Clear Swarovski Nail Crystals
- Adhesive: Nail art glue
- Top Coat: Sally Hansen Miracle Gel Top Coat
Prepare your nails with a base coat to avoid stains and improve polish adhesion. Apply two coats of OPI Neon Coral, then while the second coat is still tacky, use tweezers to place rhinestones on the desired area. Once happy with the design, apply a thin layer of top coat to secure the stones in place.
Coral gradient effect
The coral ombre effect is a stunning demonstration of the ombre technique mixed with neon coral, going from a light pink at the cuticle to a bold coral at the tips. This ombre effect is subtle and eye-catching, offering a modern twist to the classic neon coral manicure.
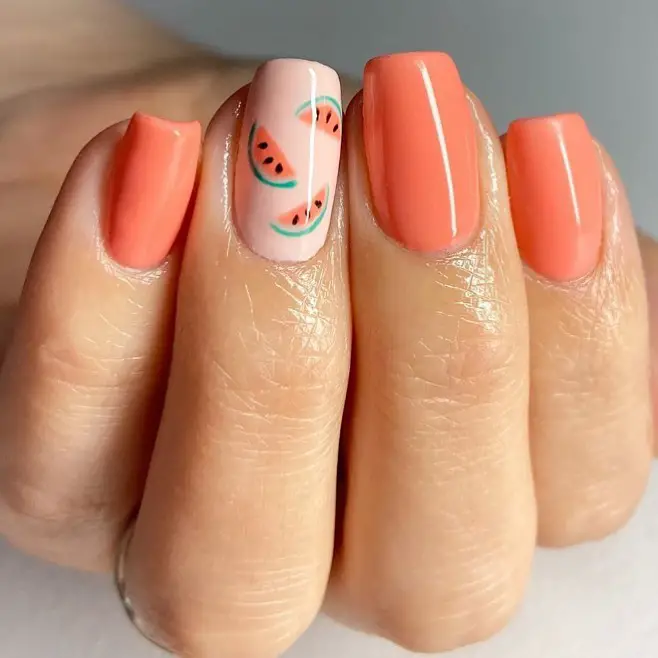
Photo credit by: @scratchmagazine
- Base Coat: CND Adhesive Base Coat
- Polish: Essie ‘The More the Merrier’ and ‘California Coral’
- Sponge: Makeup sponge for ombre effect.
- Top Coat: Chanel Le Gel Coat Long Lasting Top Coat
After applying a base coat, paint your nails with the lighter shade as a base color. Once dry, apply both shades on a sponge, overlapping them slightly. Gently rub the sponge over the nail to create the ombre effect. Repeat if necessary to intensify the ombre. Finish with a top coat for a smooth, long-lasting finish.
Subtle elegance with a floral touch
The soft charm of these neon coral nails is enhanced with a small, delicate white flower placed on one nail, adding a fun yet refined element. This style uses a glossy gel polish for a soft, lustrous finish that beautifully complements the soft, matte textures often seen in summer designs. The short nail shape ensures practicality and comfort, making it perfect for everyday use while also offering a touch of fantasy.
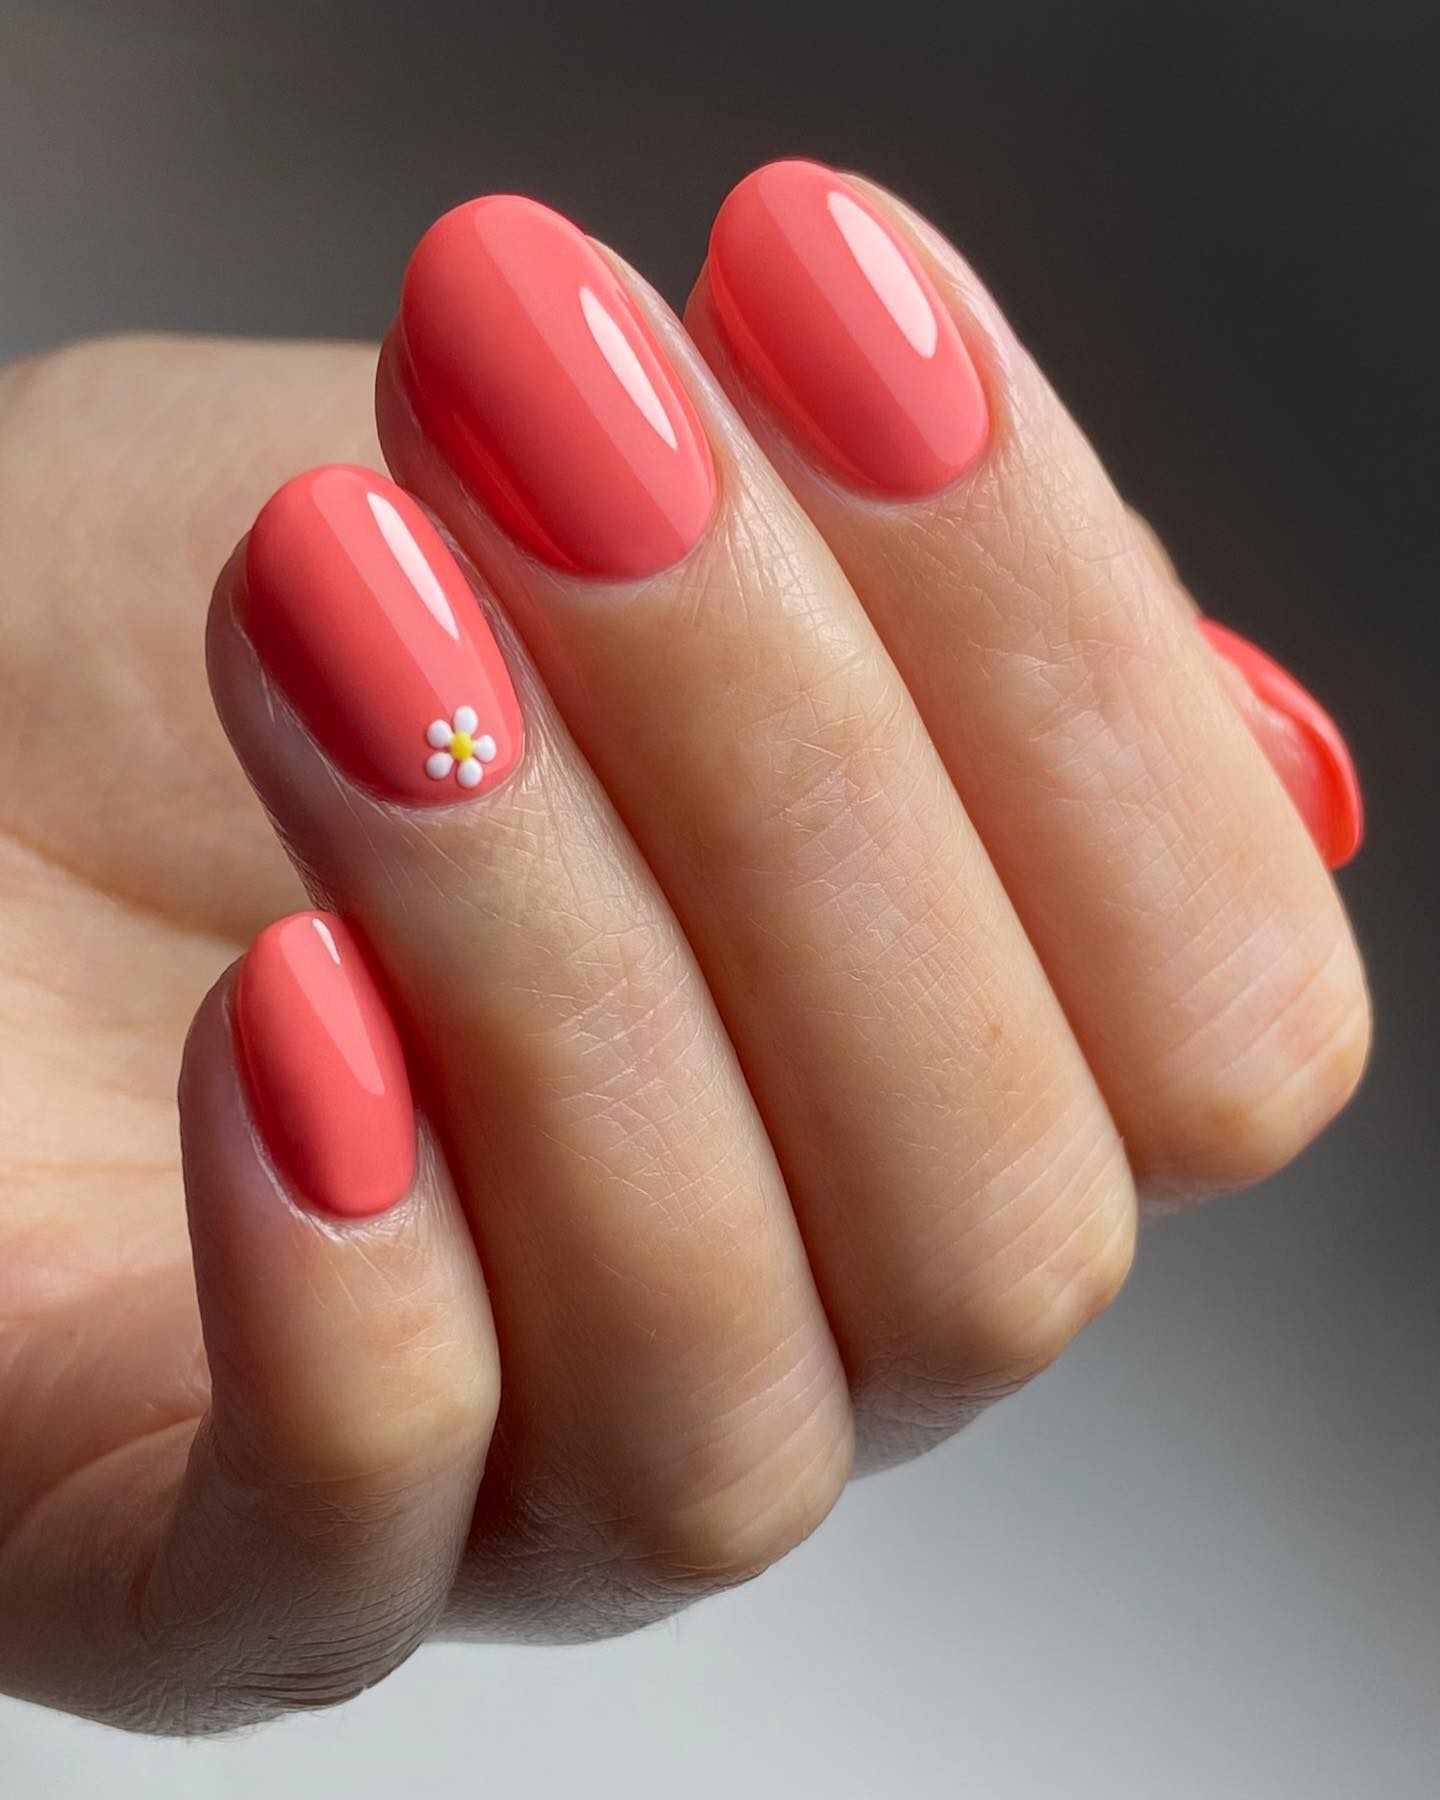 Photo credit by: @monmayernails
- Base layer: Essie Primer Base
- Polish: Essie ‘Tart Deco’
- White flower vinyl
- Top layer: OPI Gloss
Start with a base coat to protect your nails. Apply two coats of Essie ‘Tart Deco’, making sure each coat is dry before applying the next. Place the white flower sticker on the ring nail while the second layer is still slightly tacky. Finish with a gloss top coat to seal the design and enhance the vibrancy of the color.
Classic coral glamor
This image shows neon coral nails in a long, sleek style, perfect for those who love a touch of glam. The high gloss finish not only catches the light beautifully but also gives the color a deeper, more saturated look. This manicure is ideal for special occasions or for anyone who wants a bold, eye-catching look that still has an air of sophistication.
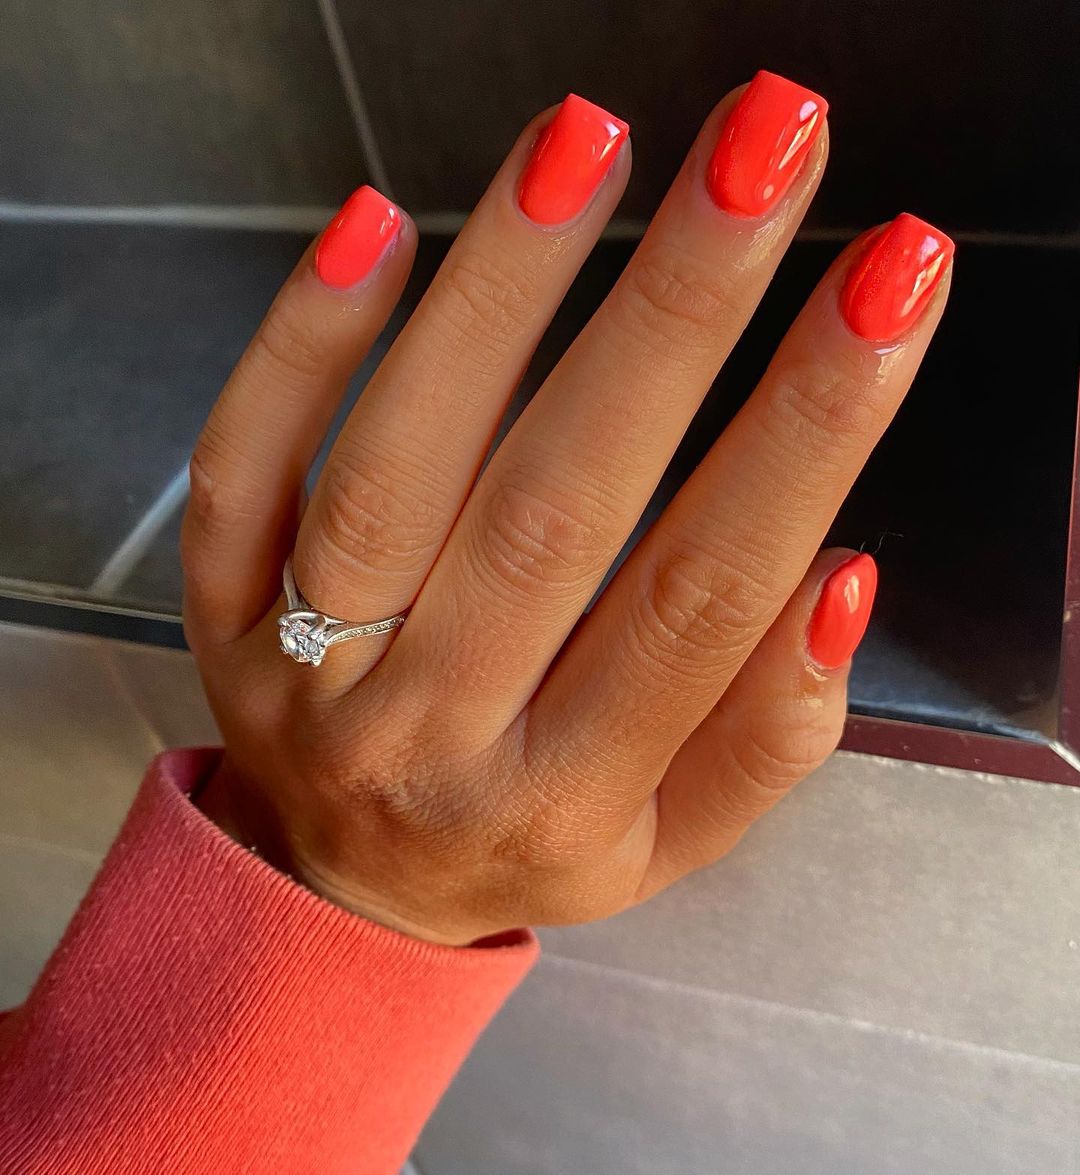 Photo credit by: @jem_nails
- Base Coat: OPI Natural Nail Base Coat
- Polish: Sally Hansen ‘Kook a Mango’
- Top layer: Essie Gel Setter
Apply a base coat to protect your nails from stains. Paint your nails with two coats of Sally Hansen ‘Kook a Mango’ for a rich coral shade. Each coat should be thin to avoid bubbles and ensure a smooth finish. Complete the look with a top coat for added shine and longevity.
ombré sunset
An exquisite example of an ombre technique, these nails feature a gradient that ranges from a bright, fiery coral to a soft peach on the cuticles, mimicking a sunset. This manicure is an artistic expression, perfect for the summer season or to add a pop of color to your outfit.
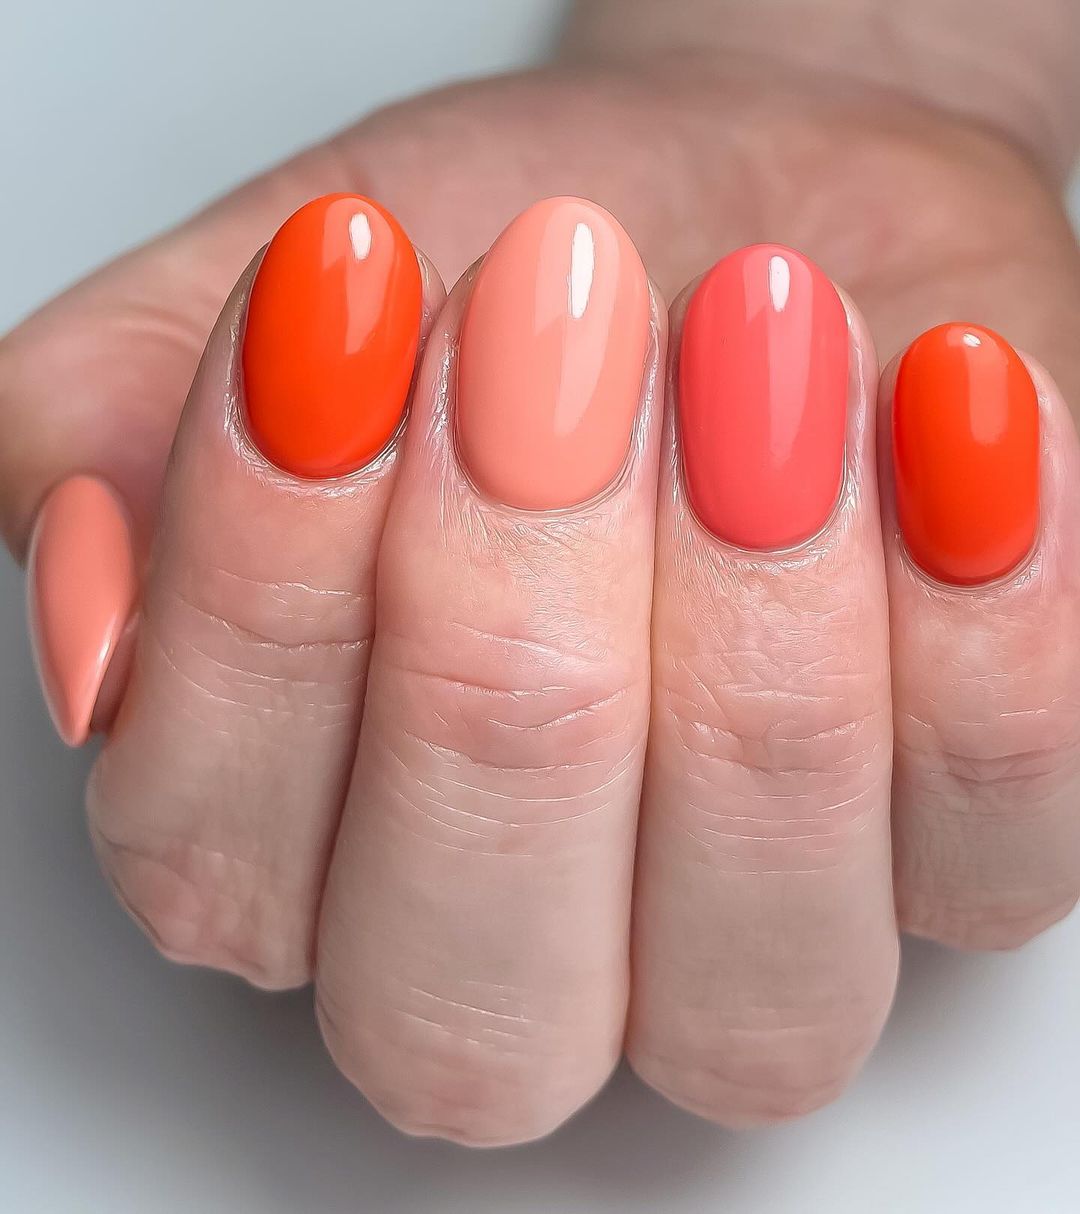
Photo credit by: @bysarahnailartist
- Base Coat: CND Adhesive Base Coat
- Polishes: ‘Atomic Coral’ by OPI and ‘Peach Side Babe’ by Essie
- Sponge: For the ombré effect
- Top Layer: Seche Vite Dry Fast Top Layer
Start with a base coat to ensure a smooth canvas. Apply ‘Peach Side Babe’ as a base color. Once dry, use a sponge to apply ‘Atomic Coral’ to the tip and blend towards the centre. You may need to repeat this step to achieve the desired gradient effect. Finish with a quick-drying top coat to seal the design and add a glossy finish.
Futuristic border with neon details
This design pushes the boundaries of traditional manicures with its bold neon pink edges on a nude base, creating a futuristic yet wearable look. The jagged neon stencil-like highlights around the tip demonstrate a creative use of color contrast and intricate details that make this nail art stand out. It is a perfect combination of art and style, ideal for those looking to make a statement.
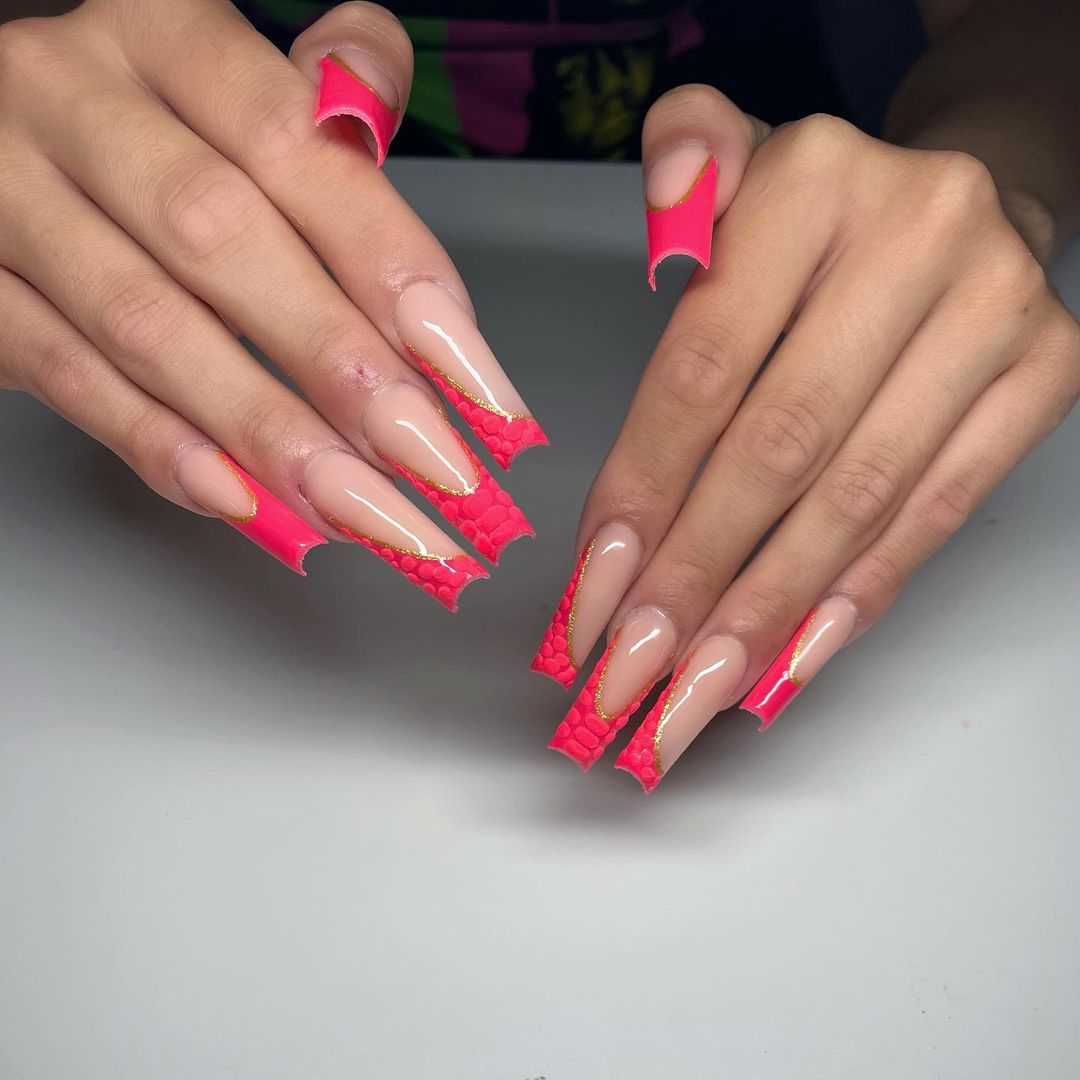 Photo credit by: @adoseofbeauty__
- Base layer: OPI Bond Aid
- Polish: Essie ‘Ballet Slipper’ for the base and China Glaze ‘Fluorescent Fuchsia’ for the tips.
- Detail brush: for precise edges
- Top layer: INM Out The Door
Start by applying a base coat to prep your nails. Paint your nails with ‘Ballet Slippers’ as a neutral base. Once dry, use a detail brush dipped in ‘Fluorescent Fuchsia’ to create the jagged neon pink edge. A steady hand or stencil may be necessary to achieve clean lines. Finish with a quick-dry top coat to seal the design and add durability.
Neon coral with fancy rhinestones
This nail design is spectacular, featuring vibrant neon coral with a luxurious touch of oversized rhinestone embellishments. The long stiletto shape accentuates bold color and bright accessories, making this style perfect for those who embrace dramatic, eye-catching nail art. This design beautifully combines the fun of bright neon with the glamor of rhinestones.
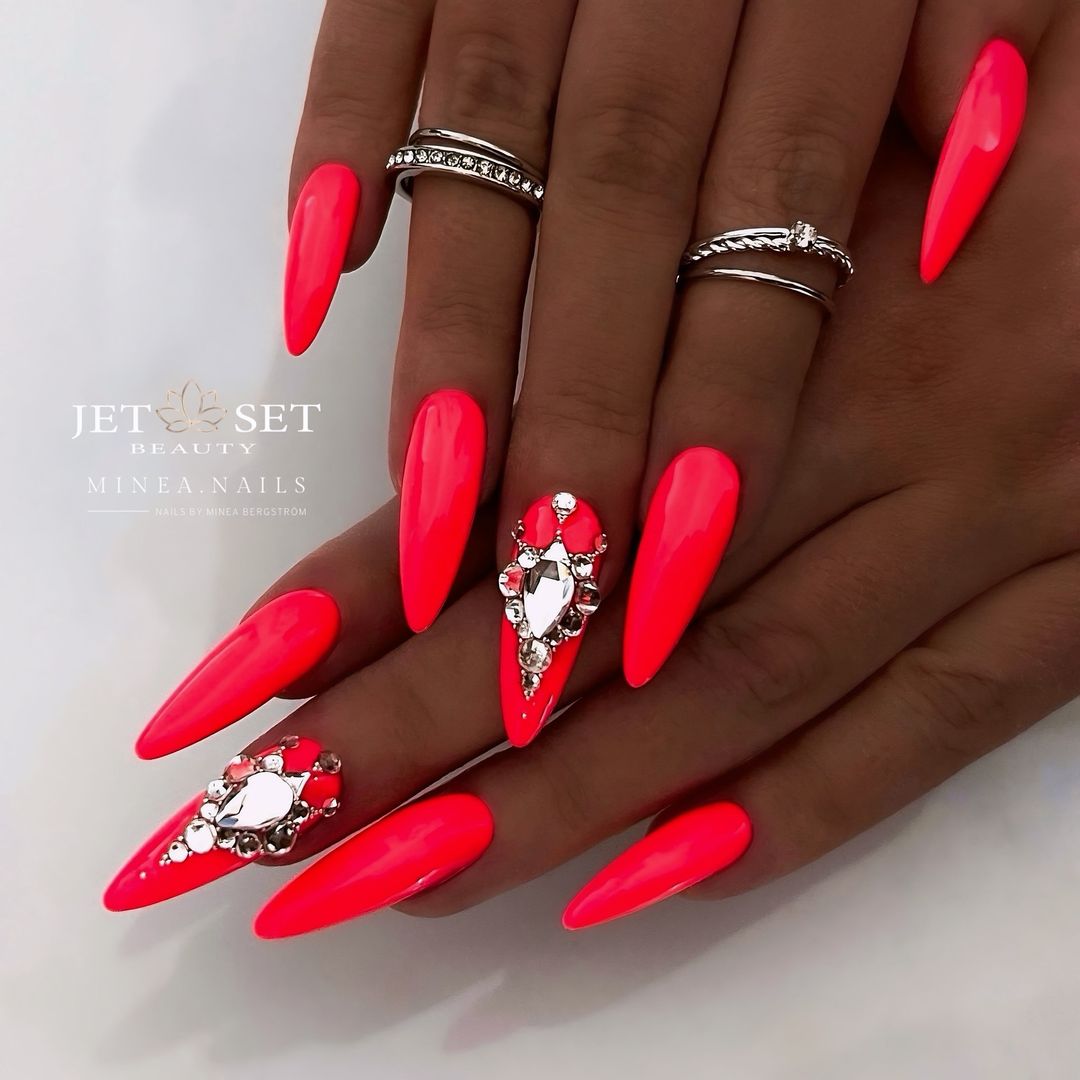
Photo credit by: @minea.nails
- Base Coat: Gelish Foundation Base Gel
- Polish: ‘Electric Pop’ by Gelish for that neon coral tone
- Rhinestones: large crystal details
- Adhesive: Nail art glue to fix the stones.
- Top layer: Gelish Top It Off
Start with a gel base coat to ensure longevity. Apply two coats of ‘Electric Pop’, curing under a UV lamp after each application. Attach rhinestones to the accent nails with a small amount of glue and apply them while the top coat is not yet cured. Cure under UV light, then seal all nails with a gel top coat to get a shiny finish and secure the rhinestones in place.
Soft Gradient Charm
Here, the soft gradient fuses neon pink with a delicate peach, creating a soft, almost airbrushed look. This more subtle approach to the neon theme is ideal for everyday wear or for those new to experimenting with vibrant colors. It’s a great example of ombre art, with a seamless transition that makes the nails look naturally sun-kissed.
 Photo credit by: @beauty_byhollie_
- Base Coat: Butter London Nail Base
- Nail polishes: ‘Neon Pink’ by Orly and ‘Peach Pastel’ by Sally Hansen
- Sponge: To apply the gradient.
- Top Coat: Deborah Lippmann Gel Lab Pro
Apply a base coat to protect nails. Paint the entire nail with ‘Peach Pastel’ as a base tone. Then, with a sponge, apply ‘Neon Pink’ to the tip and gently rub towards the center to create the ombre effect. Repeat if necessary to obtain a more vivid coloration. Finish with a top coat for a smooth, shiny finish.
Coral elegance with glitter
These neon coral nails are dotted with a subtle shimmer that catches the light beautifully, adding a layer of depth and shine to the manicure. The glossy finish not only enhances the color but also contributes to the overall luxurious feel of the design. This style is perfect for adding a festive touch to any outfit, balancing fun and effortless elegance.
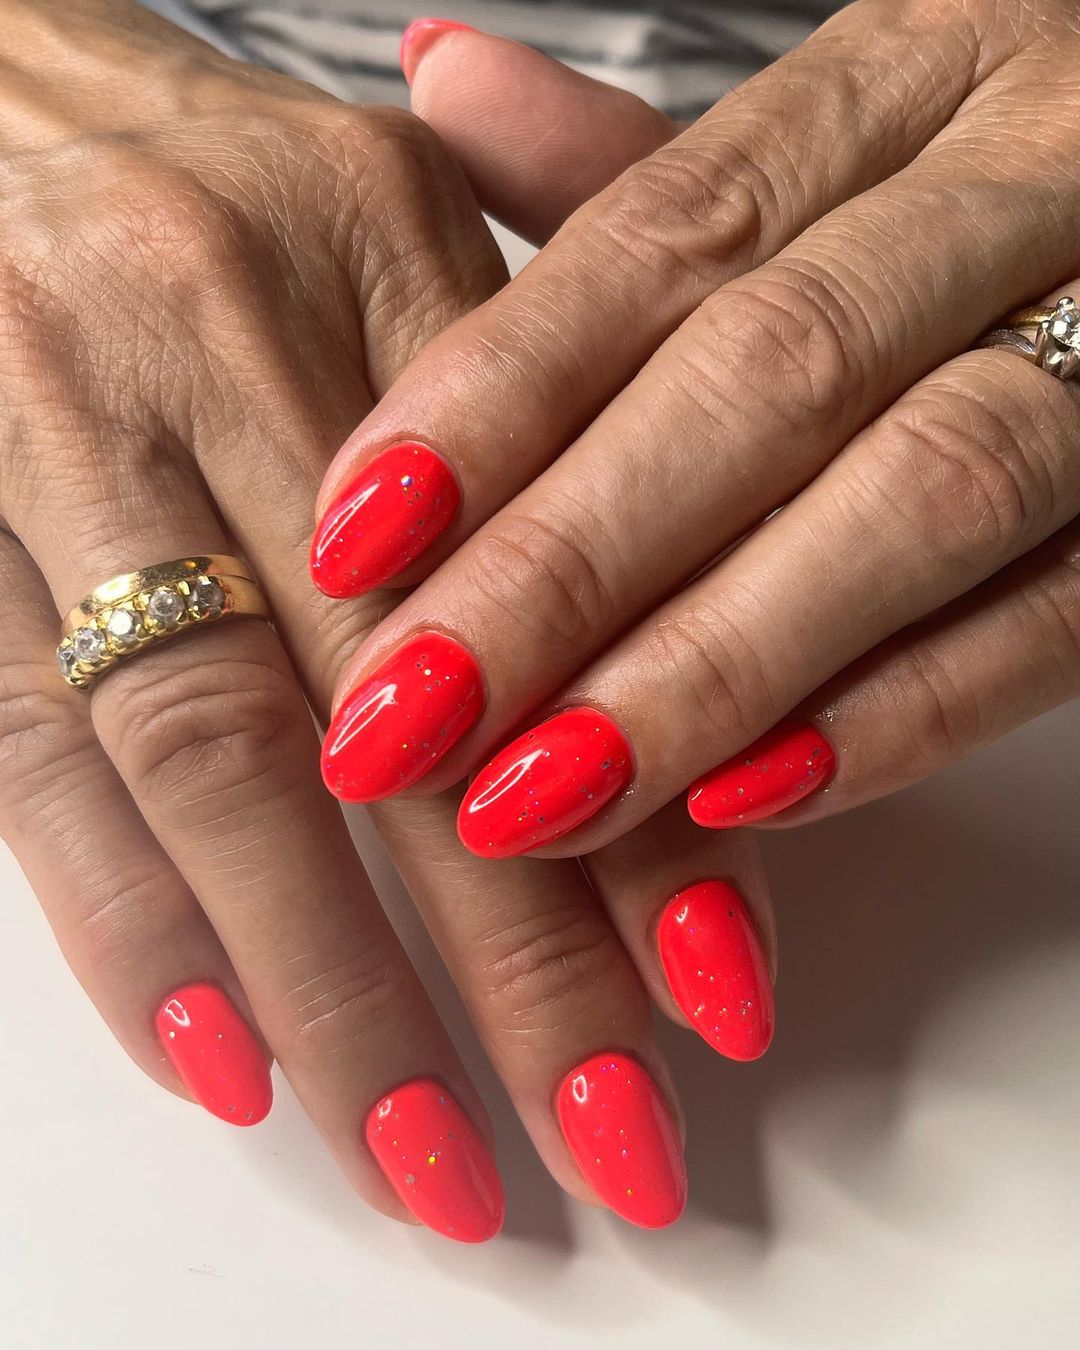 Photo credit by: @marzia_baca
- Base Coat: Sally Hansen Hard as Nails
- Polish: ‘Coral Carnival’ by China Glaze
- Glitter Polish: Essie ‘Sparkle on Top’
- Top Coat: Revlon Extra Life No Chip Top Coat
Start with a solid base coat to protect your nails. Apply two coats of ‘Coral Carnival’, allowing each to dry completely. Add a light coat of ‘Sparkle on Top’ to introduce that subtle shine. Finish with a durable top coat to enhance shine and ensure longevity.
Modern nail art
This nail design combines vibrant neon coral with a touch of modern art, with abstract swirls in yellow and pink creating a dynamic visual effect. The use of bright, contrasting colors makes the nails stand out, while the elegant gel finish ensures a soft, long-lasting shine. This style is particularly appealing to those who enjoy expressive and artistic nail designs.
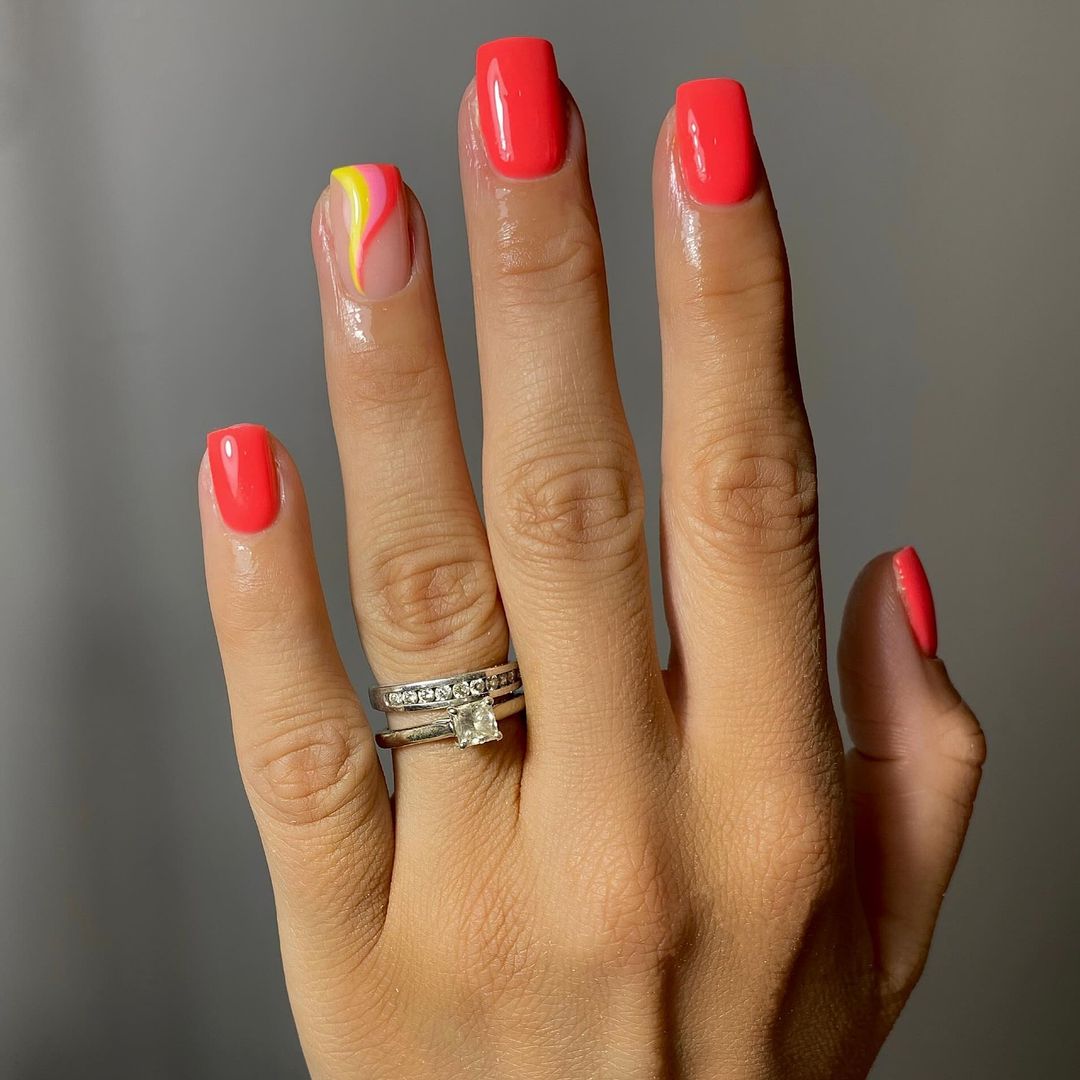
Photo credit by: @natalieholtnailartist
- Base Coat: OPI Natural Nail Base Coat
- Polish: Gelish ‘Manga-round With Me’ for the coral base
- Artistic colors: yellow and pink acrylic paint.
- Detail Tools: Fine Swirl Brush
- Top layer: Gellen top layer
Prepare the nail with a base coat for longevity. Apply a coral base using ‘Manga-round With Me’. Once dry, use a thin brush to paint the swirls with yellow and pink acrylic paint. This may require a steady hand or the use of a template to obtain more precise shapes. Seal the design with a gel top coat for a long-lasting glossy finish.
Sun shine
The gradient on these nails mimics the stunning colors of a sunset, mixing shades of neon orange and soft peach. The smooth transition creates a warm, bright effect, perfect for any season, but especially beautiful during the summer. This ombre design is both eye-catching and sophisticated and offers a fresh take on typical neon manicures.
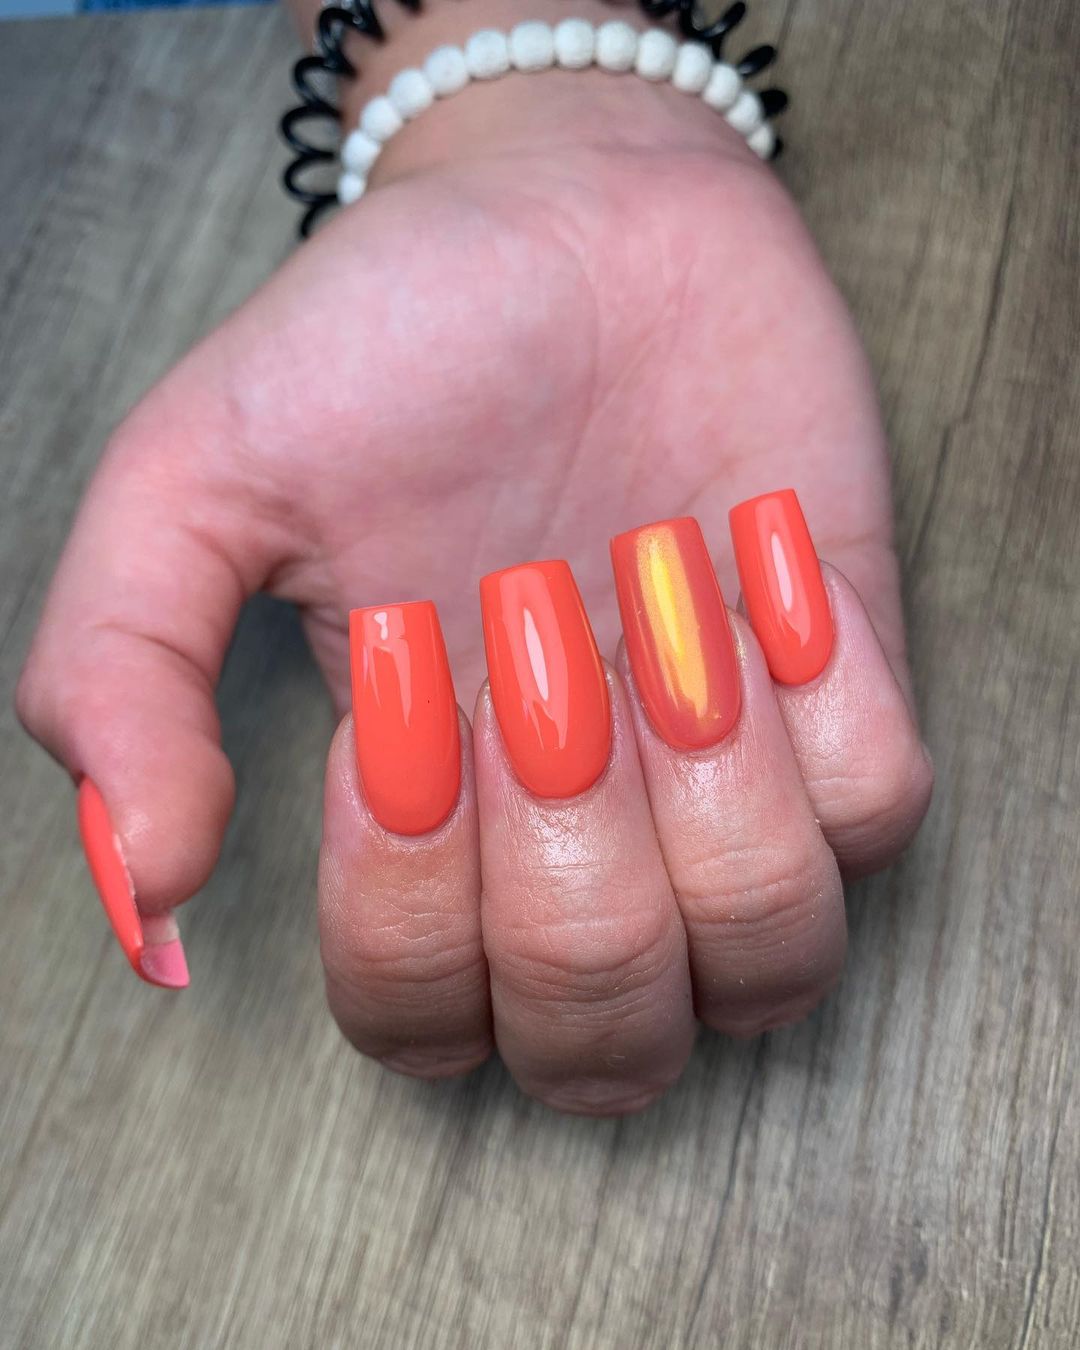 Photo credit by: @ongles.perpignan
- Base layer: ORLY base layer
- Polishes: ‘Neon Orange’ by American Apparel and ‘Peach Perfect’ by Essie
- Sponge: for the gradient effect.
- Top Layer: Seche Vite Dry Fast Top Layer
After applying a base coat, paint the entire nail with ‘Peach Perfect’ as a base shade. Using a sponge, apply ‘Neon Orange’ to the tip of the nail and blend towards the center to create the ombre effect. Repeat if necessary to improve color matching. Finish with a quick-drying top coat to seal the design and add a glossy finish.
Elegant touch with artistic style
This manicure combines simplicity with artistic expression. One nail features intricate white line art on a soft peach base, which contrasts beautifully with the solid peach nails. The subtle addition of a glitter accent nail adds a touch of sparkle, providing an overall look that is both simple and elegant. This design is perfect for those who appreciate a clean aesthetic with a touch of creativity.
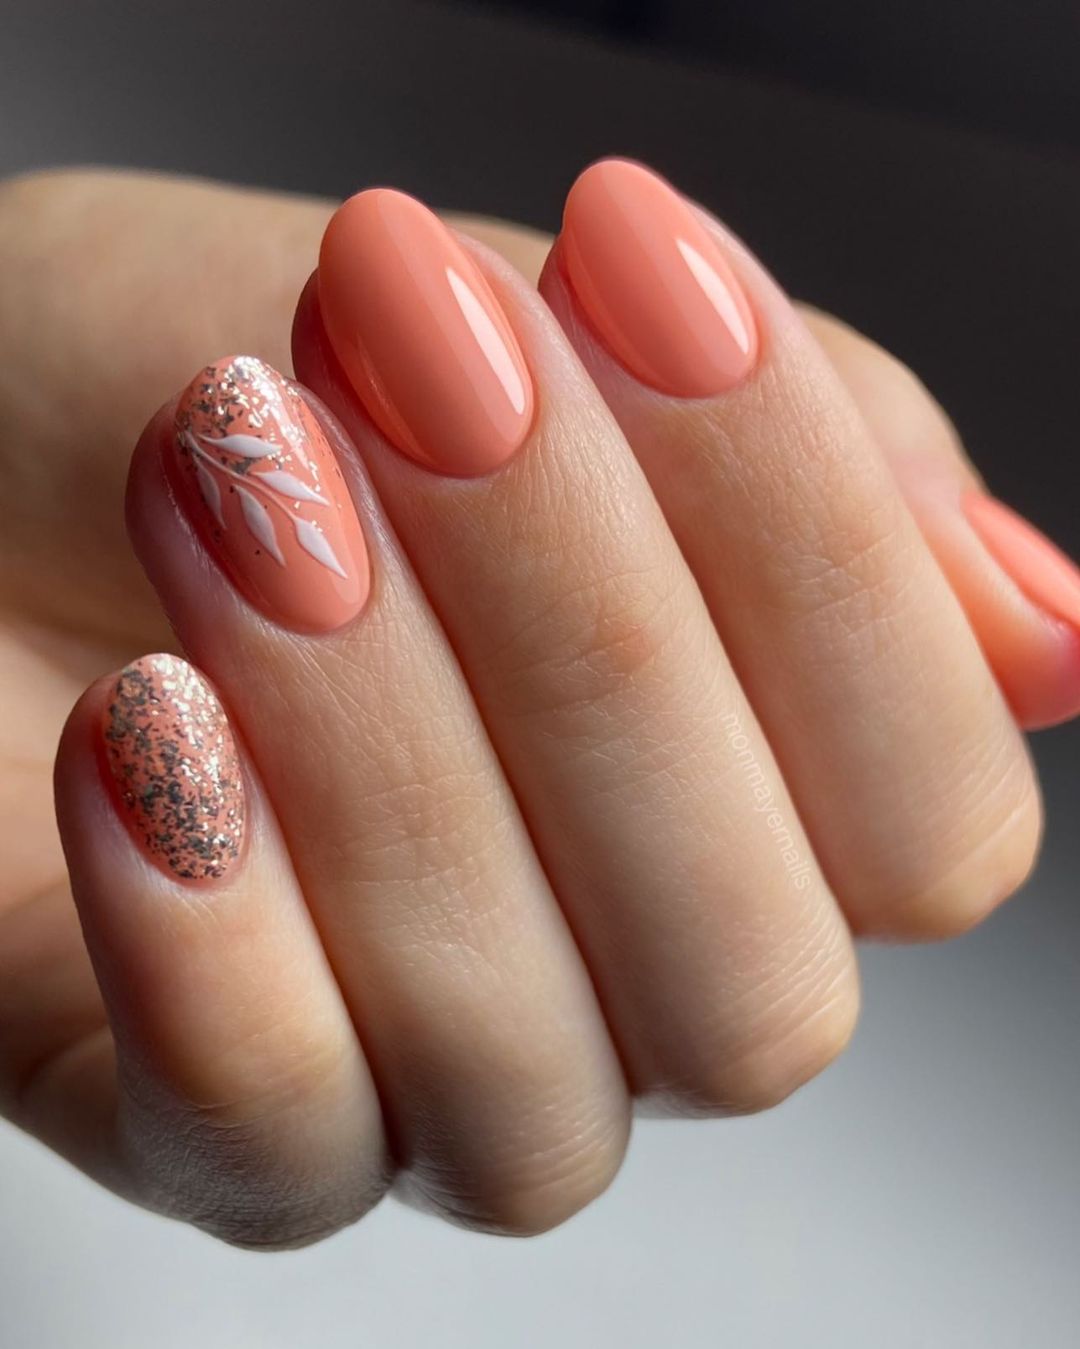
Photo credit by: @monmayernails
- Base Layer: Zoya Base Layer
- Polish: ‘Peachy Keen’ by China Glaze for base and accent nails
- White Nail Art Pen – For Detailed Line Work
- Glitter Nail Polish: ‘Disco Ball’ by Sally Hansen
- Top layer: INM Out The Door top layer
After applying a base coat, paint all nails except one accent nail with ‘Peachy Keen’. For the accent nail, apply a base coat of the same color and then use a white nail art pen to draw the detailed design. Add a coat of ‘Disco Ball’ to another nail for a shiny effect. Seal all nails with a top coat for durability and shine.
Vivid orange solid color
Featuring a vibrant orange, this manicure exudes confidence and energy. The application of the solid color is flawless, with a high-gloss finish that enhances the depth and shine of the shade. Perfect for any season, especially summer and fall, this bold color choice is sure to turn heads and stand out from the crowd.
 Photo credit by: @nicolarose_beauty
- Base Coat: OPI Natural Nail Base Coat
- Polish: ‘Hot & Spicy’ by OPI
- Top Coat: Essie Gel Setter Top Coat
Start with a base coat to protect your nails. Apply two coats of ‘Hot & Spicy’ for vibrant, even coverage. Each coat should be thin to avoid bubbles and ensure a smooth finish. Complete the look with a top coat for added shine and longevity.
Creative red with white designs.
This design takes a classic red manicure and elevates it with white graphic patterns, adding a modern touch. The stark contrast between the bright red and white designs draws attention, making it a standout option for those who like their nails to stand out. This style is a great option for artistic people looking to show off their unique style through their manicure.
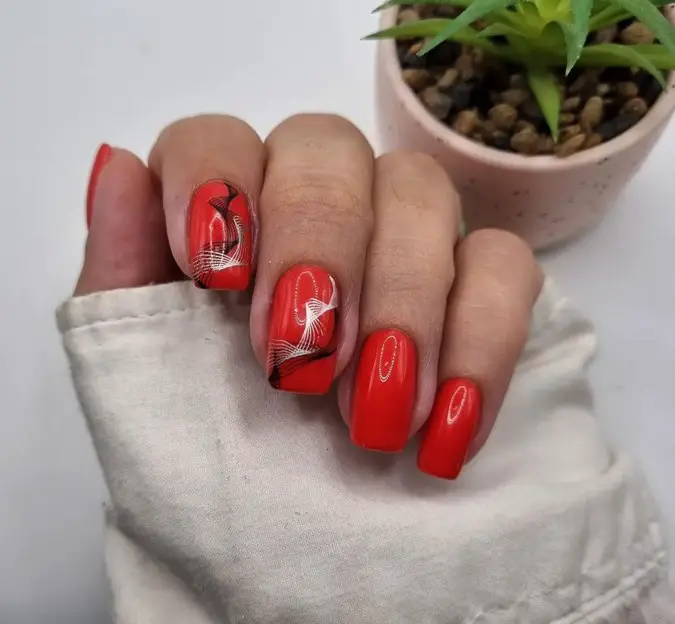
Photo credit by: @manichiuragiorgi
- Base Coat: CND Adhesive Base Coat
- Polish: ‘Really Red’ by Essie
- White Nail Art Pen – For Precise Designs
- Top Layer: Seche Vite Dry Fast Top Layer
Prepare your nails with a base coat. Apply two coats of ‘Really Red’ for a deep, vibrant base. Use a white nail art pen to carefully draw graphic designs on selected nails. Finish with a quick-drying top coat to protect the artwork and enhance the shine of the enamel.
Matte Neon Elegance
This nail set epitomizes minimalist elegance with a striking neon matte finish. The sleek, pointed shape complements the matte texture and offers a modern and sophisticated look. This style is perfect for those who prefer a bold color without additional embellishments, focusing on shape and finish to draw attention.
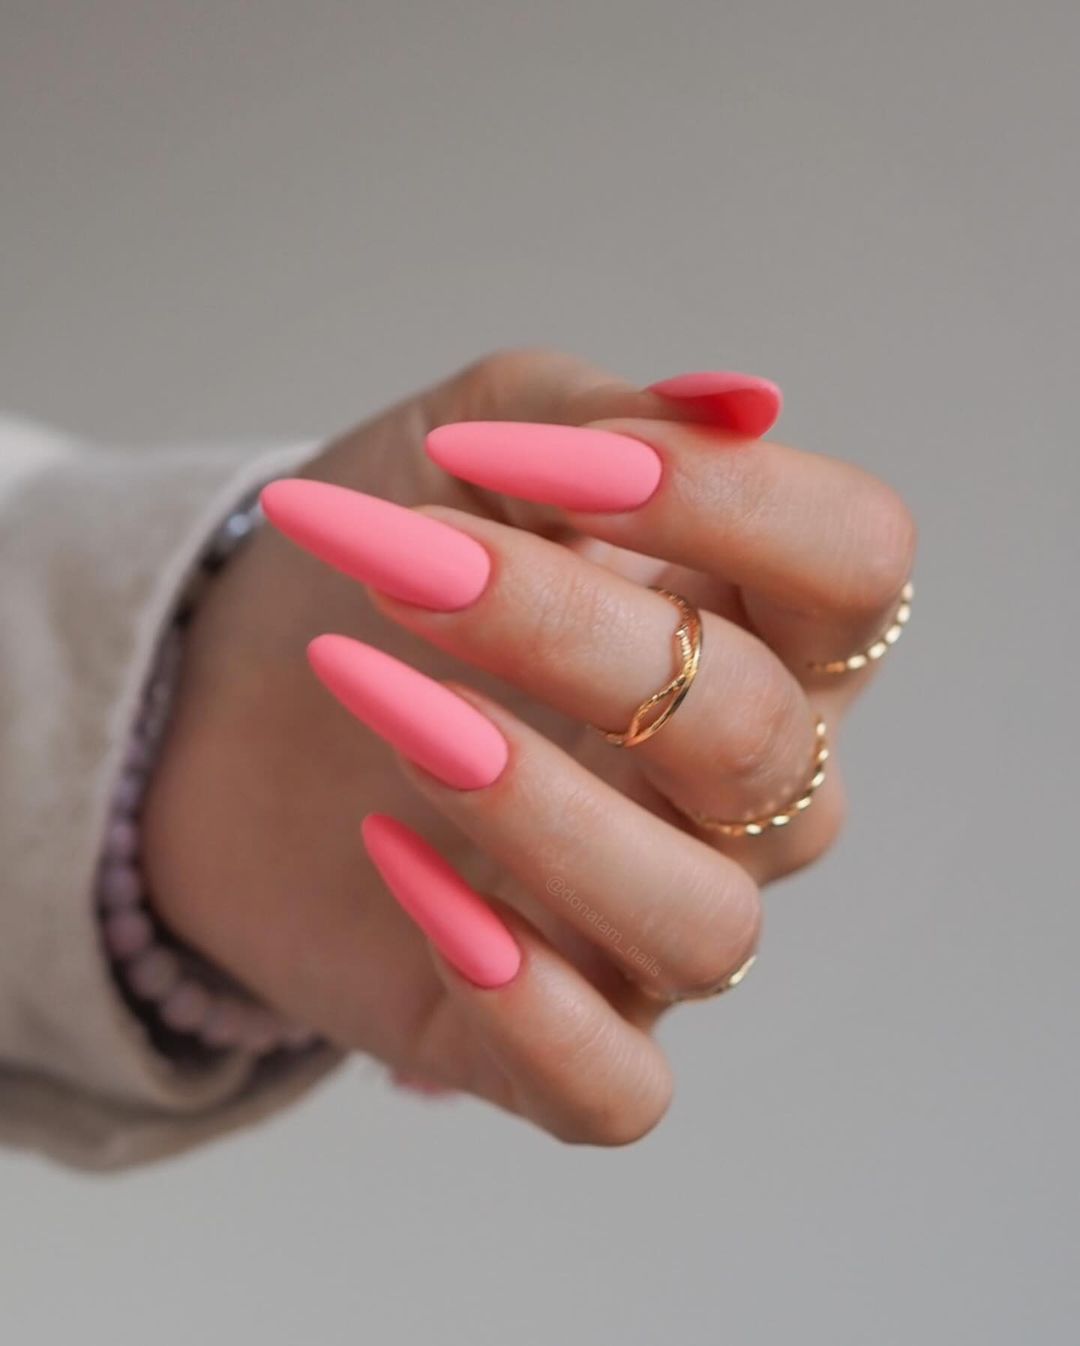 Photo credit by: @donatam_nails
- Base Coat: CND Adhesive Base Coat
- Polish: ‘Neon Pink’ by Orly
- Matte Top Coat: Essie Matte About You
Apply a base coat to protect your nails and provide a sticky surface for the polish to adhere to. Apply two coats of ‘Neon Pink’, allowing each coat to dry completely. Finish with a matte top coat to transform bright neon into a sleek, matte look.
Swirling Orange Art
These nails showcase a creative and artistic use of color with bright orange swirling patterns on a translucent base. The swirls are meticulously drawn and offer a fun yet elegant design that is both eye-catching and unique. The use of negative space enhances the artistic style, making each nail a small canvas of modern art.
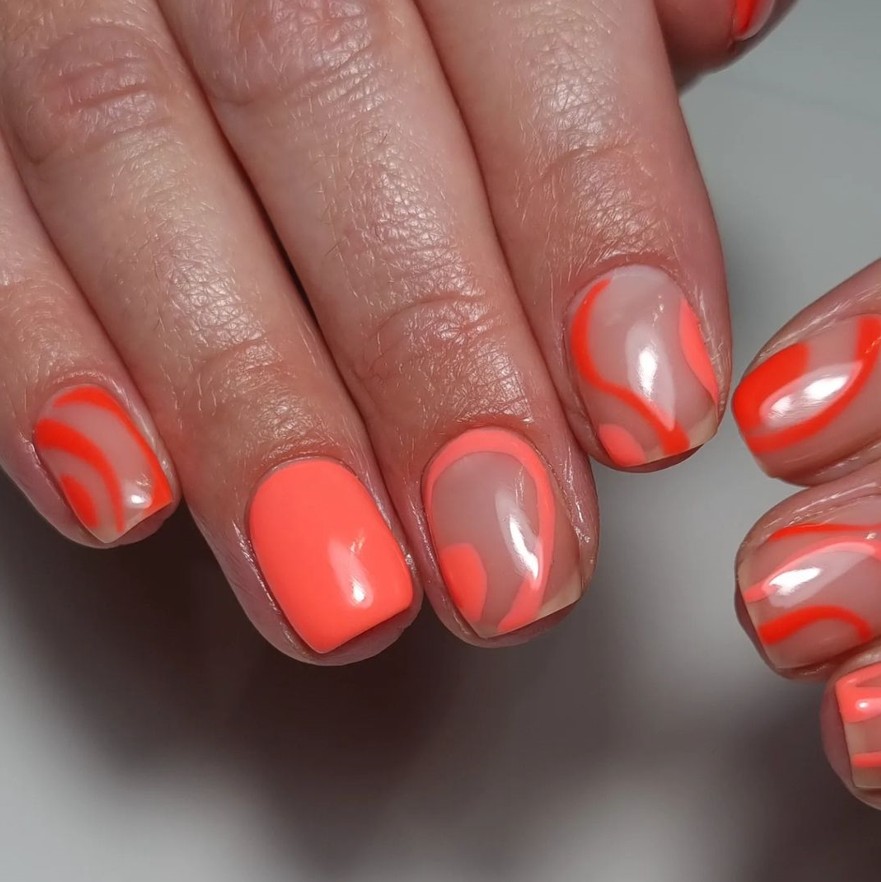
Photo credit by: @sorayasteel
- Base layer: Orly Bonder
- Polish: ‘Orange Hot’ by China Glaze
- Detail Brush – For intricate swirls
- Top layer: INM Out The Door
Start by applying a base coat for long-lasting wear. Use a detail brush and “Orange Hot” to create swirls on a clean, light base. The key is to let each swirl flow naturally, allowing some parts of the nail to show through for a modern look. Seal the design with a top coat to improve durability and add shine.
Neon glow fusion
This design combines a vibrant neon pink with a festive glitter accent nail, creating a fun and eye-catching manicure. The shine of the glitter nail complements the neon pink, making it perfect for parties or special occasions where you want your nails to stand out and shine.
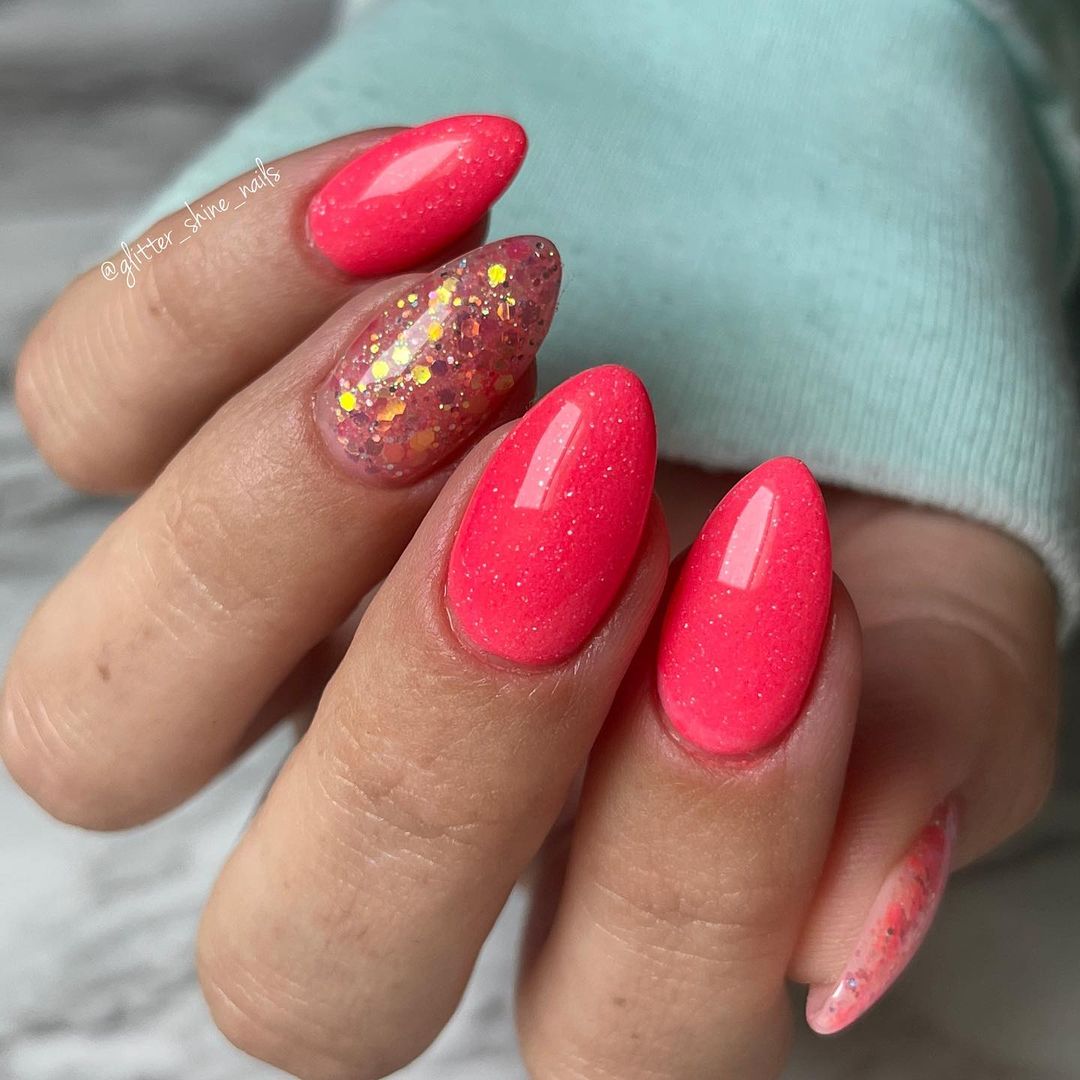 Photo credit by: @glitter_shine_nails
- Base layer: Orly Rubber Base
- Polish: ‘Electric Pink’ by OPI
- Glitter Nail Polish: ‘Pink Glitz’ by Sally Hansen
- Top Layer: Seche Vite Dry Fast Top Layer
Apply a base coat to protect your nails. Paint all but one nail with ‘Electric Pink’. For the decorative nail, apply a base of the same pink and then a coat of ‘Pink Glitz’ glitter polish. This layering technique helps the colors pop and the glitter catches the light beautifully. Finish with a quick-drying top coat for a smooth, shiny finish that lasts.
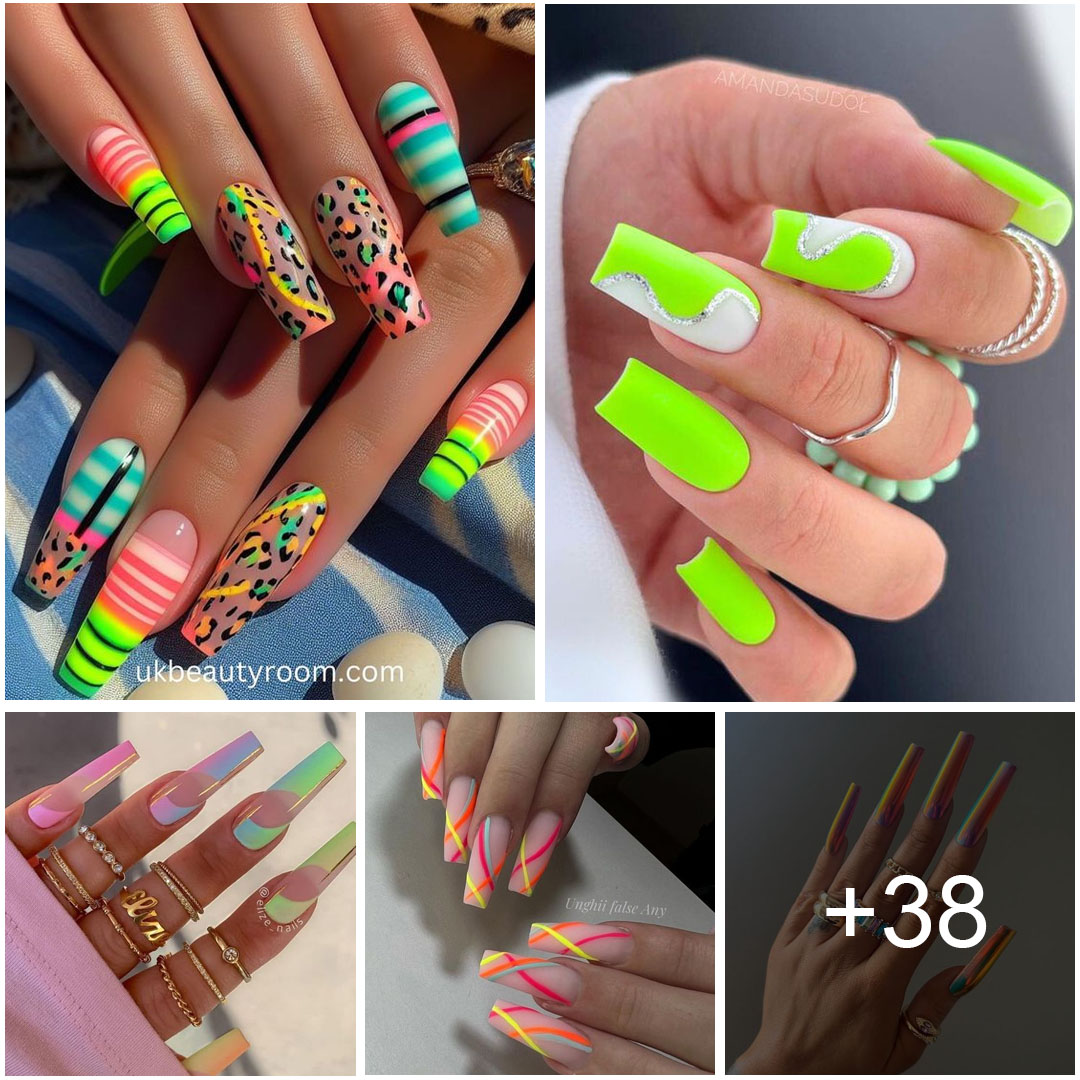
Leopard print glamor
Releasing the wild side, this nail design combines eye-catching leopard spots with vibrant pink bases. It’s a fun yet elegant look that combines traditional nail art with a modern twist. The leopard pattern is artfully applied on a solid pink that enhances the pop and dynamism of the design, making it perfect for those who love to stand out.
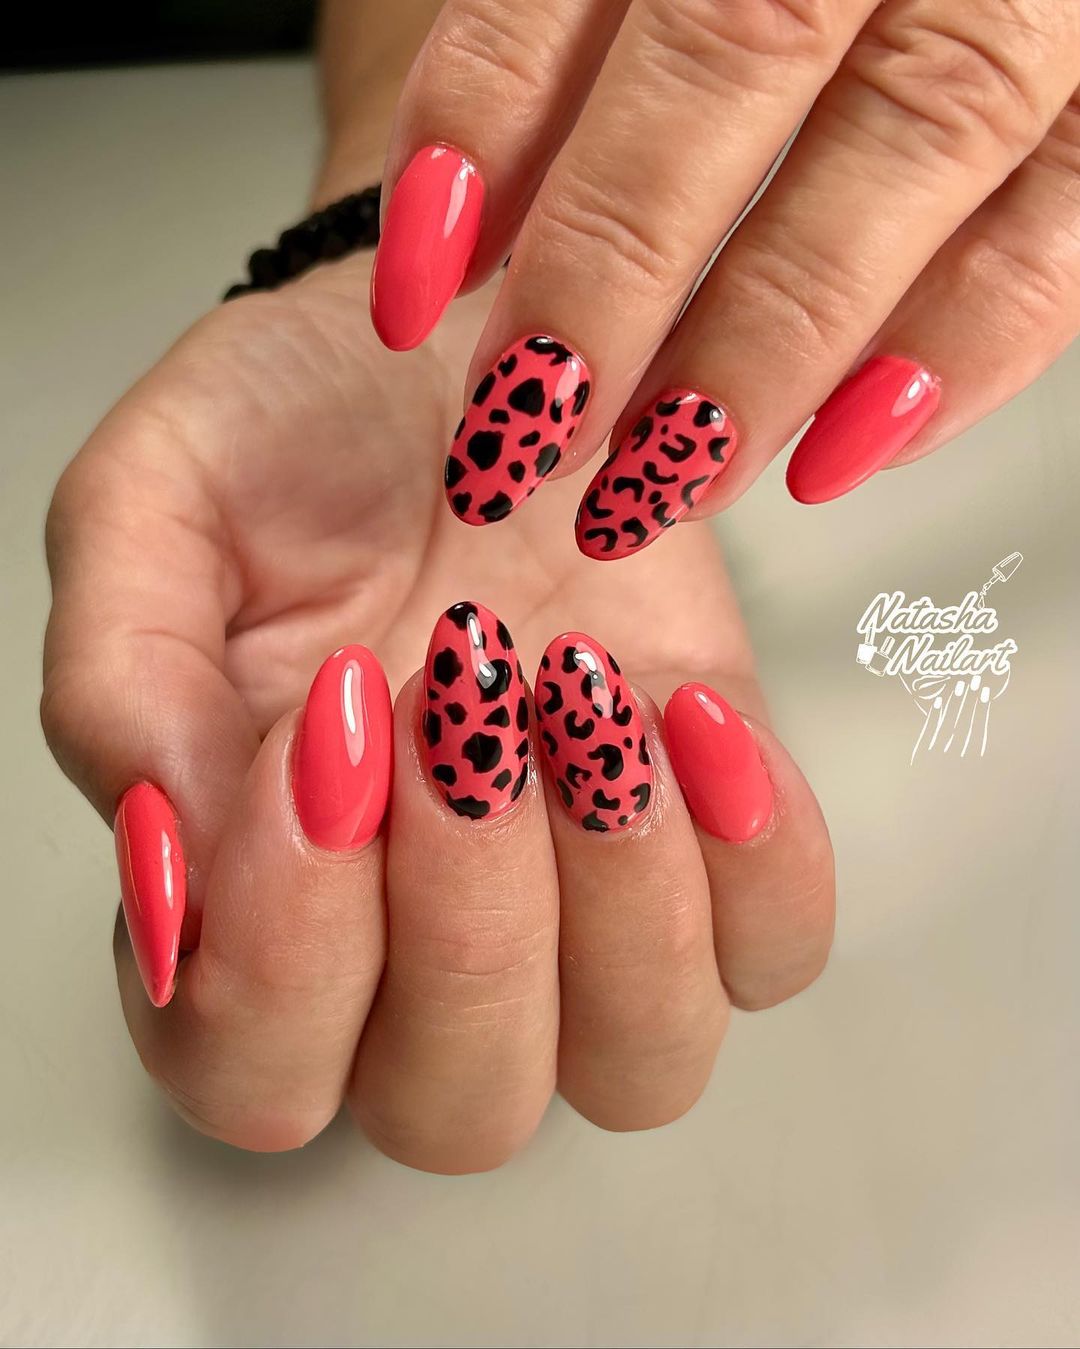 Photo credit by: @natasha_nailart
- Base layer: Sally Hansen Double Duty
- Polish: ‘Bubblegum Pink’ by OPI
- Black and dark pink nail polish: for leopard spots
- Detail Brush: for precision in creating points
- Top Layer: Seche Vite Dry Fast Top Layer
Start with a protective base coat. Apply two coats of ‘Bubblegum Pink’ as a base color. Using a detail brush, apply the black and dark pink polish to create the leopard spots. The key is to place the darkest points first and then lightly surround them with black to define the shape. Seal the design with a glossy top coat for a long-lasting finish.
Gradient Pink French Tip
This sophisticated design modernizes the French tip with an ombre pink that fades perfectly onto the natural nail. It’s a subtle yet striking look that elevates the traditional manicure to a modern and stylish level. This design is perfect for both informal and formal environments, as it offers a touch of elegance without being overpowering.
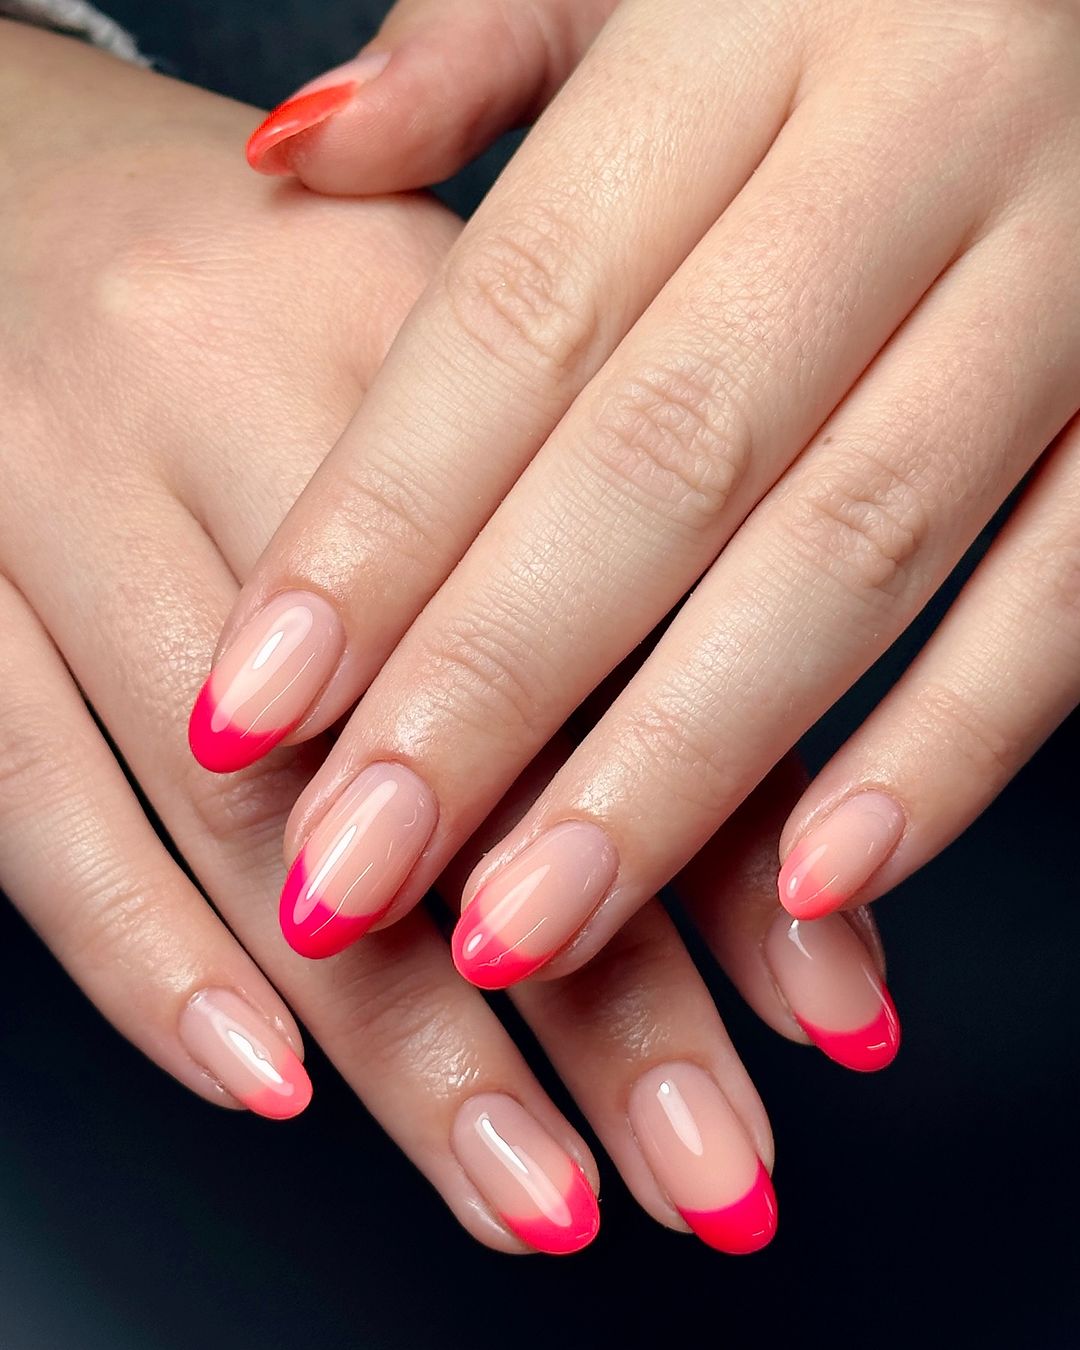 Photo credit by: @50_shadesofnails
- Base Layer: Essie Ridge Fill Base Layer
- Polish: Essie’s ‘Pink Gradient’ as advice
- Sponge: to achieve a soft gradient effect
- Top layer: Sally Hansen Insta-Dri Anti-Chip
Apply a base coat to protect and soften nails. Lightly dab a sponge with ‘Pink Gradient’ and gently press onto the tips of your nails, blending downwards to create a fade effect. Finish with a top coat to enhance the ombre look and add shine.
Minimalist pink with dot details
This nail design captures elegance in simplicity with a soft pink base and minimalist dot details at the base of each nail. The clean lines and subtle decoration make it an excellent choice for those looking for a refined and understated style. It is particularly attractive for professional settings or sophisticated events.
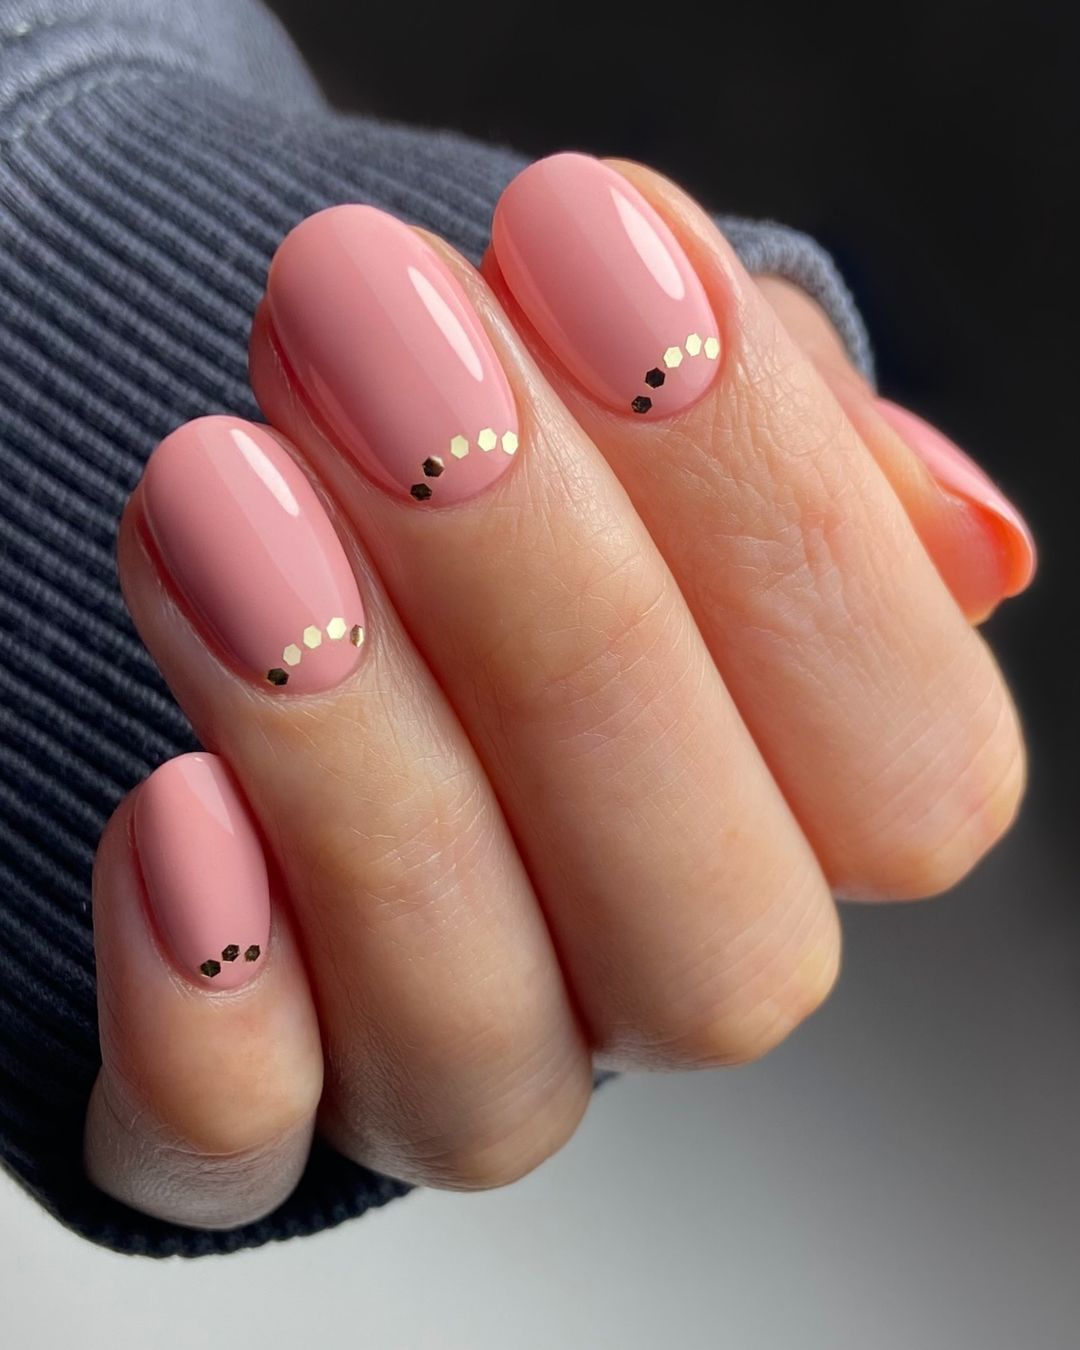 Photo credit by: @monmayernails
- Base Coat: OPI Natural Nail Base Coat
- Polish: ‘Pale Pink’ by Chanel
- Dot Tool – for precise dot placement
- Black and gold enamel: for the points.
- Top Coat: Chanel Le Gel Coat Long Lasting Top Coat
Prepare nails with a base coat for longevity. Paint all nails ‘Pale Pink’. Once dry, use a dotting tool dipped in black and gold polish to add a small group of dots to the base of each nail. This should be subtle and serve as an elegant highlight rather than dominating the design. Conclude with a durable top coat to preserve the art and add a luxurious shine.
Coral elegance with artistic details
This nail design beautifully combines classic coral polish with detailed nail art and rhinestone embellishments for a touch of luxury. The standout feature is the intricate white pattern on one nail, which contrasts starkly with the solid coral background, providing a sophisticated and creative look. The addition of rhinestones on the adjacent nails enhances the elegance, making this design perfect for special occasions.
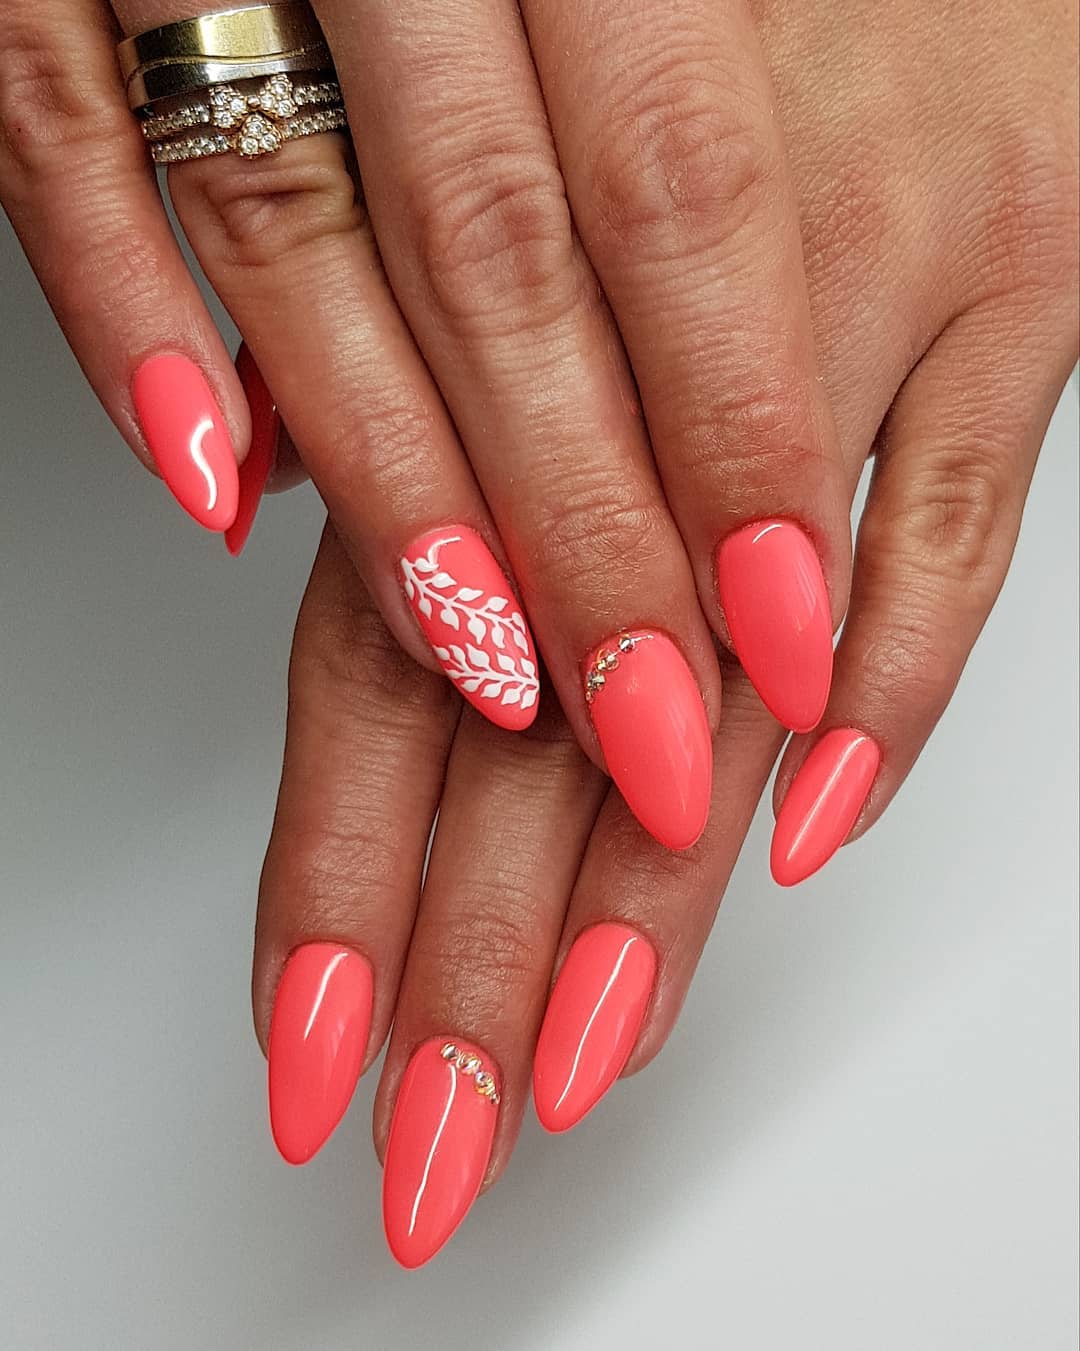 Photo credit by: @kubiak_nails
- Base Coat: OPI Natural Nail Base Coat
- Polish: ‘Coral Reef’ by Essie
- White nail polish: for detailed patterns
- Rhinestones: small crystals for a touch of sparkle.
- Top Coat: Essie Gel Setter Top Coat
Apply a base coat to protect nails. Paint all nails with ‘Coral Reef’ except the feature nail. On the feature nail, use white nail polish to create delicate patterns. Add rhinestones to the base of selected nails using a small dot of nail glue. Seal all designs with a top coat for durability and a glossy finish.
Pop art perfection
These nails are a vibrant display of pop art inspiration, with neon colors and bold, abstract designs that resemble melted paint. This look is fun, colorful, and perfect for those who love to express their artistic side through their manicure. The use of bright colors makes each nail stand out, with unique patterns ensuring no two nails are the same.
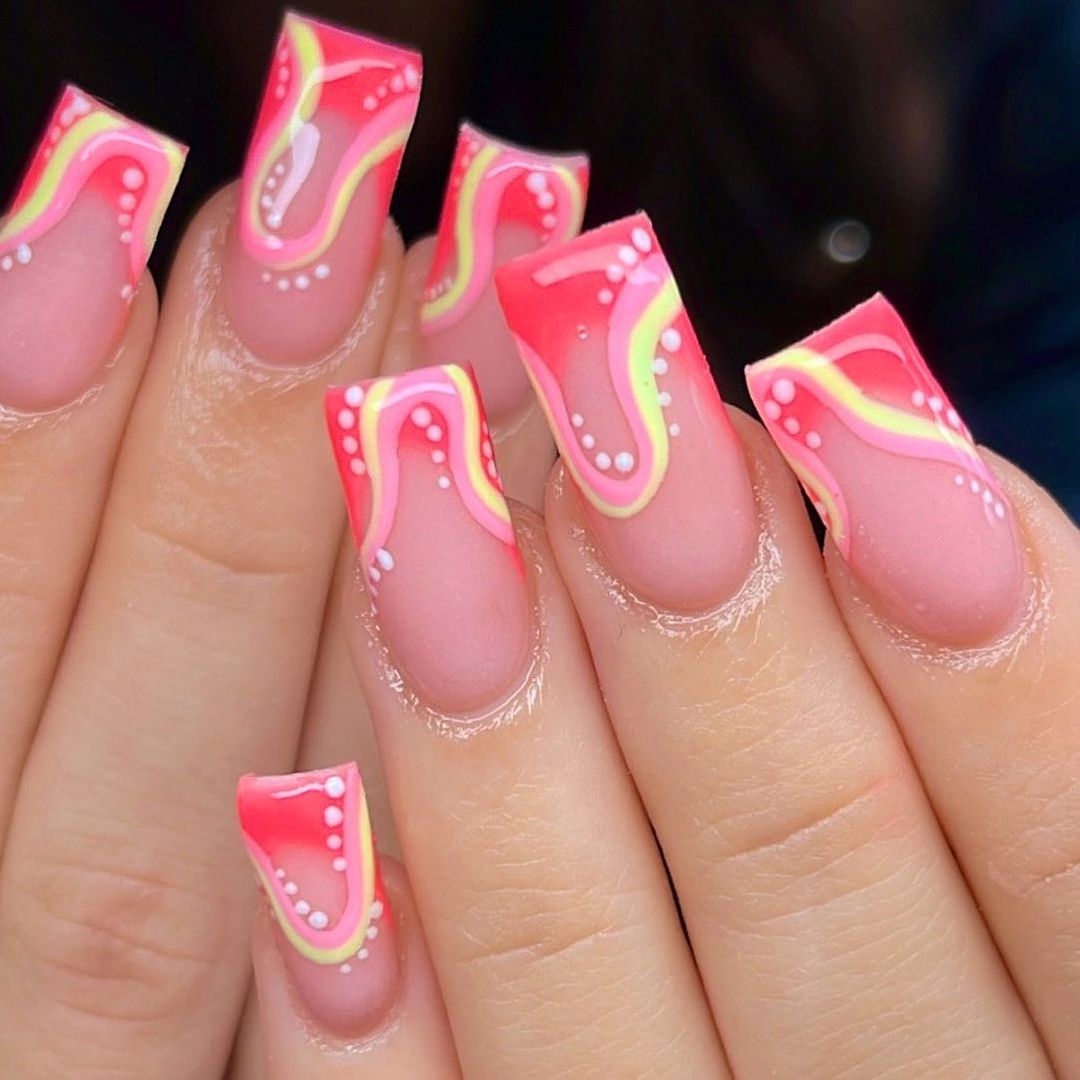 Photo credit by: @_nailsbylucyy
- Base Coat: CND Adhesive Base Coat
- Polish: neon colors from the OPI Brights collection
- Detail Brushes – For Intricate Line Work
- Top layer: INM Out The Door top layer
Start with a protective base coat. Use a combination of neon glazes to create the abstract, melted paint effect. Apply different colors fluidly and overlapping, using detail brushes to refine edges and add small accents. Once dry, apply a clear top coat to seal in the vibrant designs and add a beautiful shine.
Vibrant abstract flow
This nail design features a stunning abstract pattern that flows across each nail, creating a dynamic and eye-catching effect. The combination of soft pink and deep yellow accents outlined in vibrant orange gives these nails a fresh and energetic look. It is an artistic and modern approach to nail design, perfect for making a fashion statement.
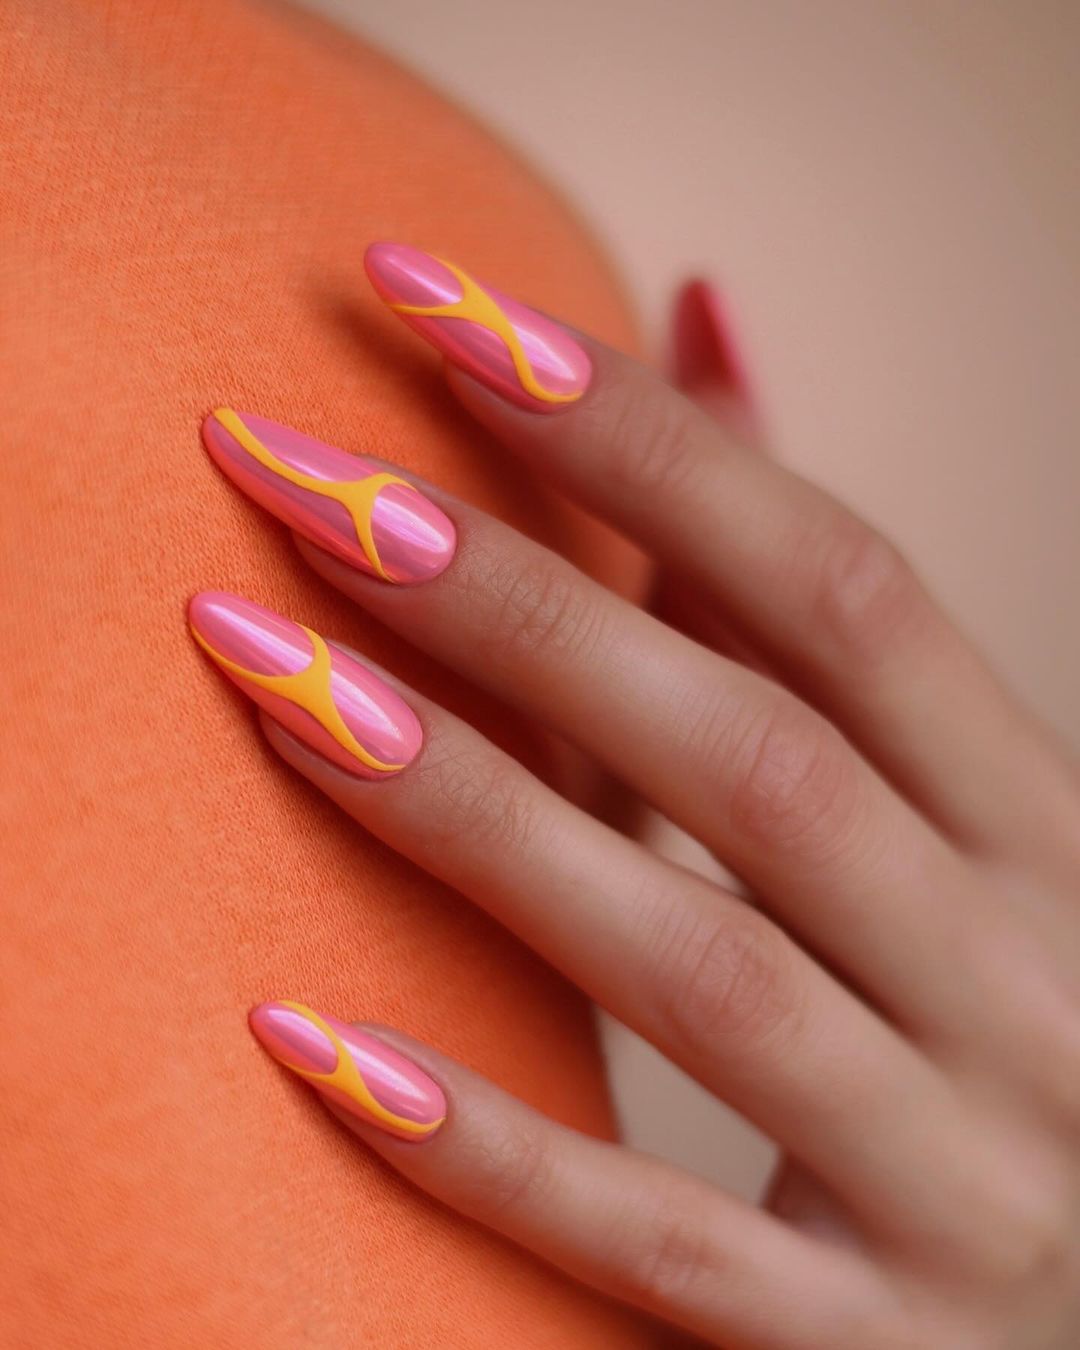 Photo credit by: @karolina.er
- Base Coat: OPI Natural Nail Base Coat
- Polishes: Essie ‘Pale Pink’ for the base, ‘Sunny Yellow’ and ‘Fiery Orange’ for the details
- Detail Brushes – For Precise Lines and Curves
- Top Layer: Seche Vite Dry Fast Top Layer
Apply a base coat to protect your nails. Paint a pale pink base and let dry completely. Use detailing brushes to add yellow and orange details, creating fluid abstract patterns on each nail. Make sure each color is applied smoothly for a perfect look. Finish with a top coat to protect the design and add a brilliant shine.
Elegant pink swirls with gold details
This nail design takes elegance to the next level with intricate swirls that combine neon pink, soft blush, and luxurious gold details. The swirls are delicately painted, displaying sophisticated artistry that is both beautiful and unique. The addition of gold not only adds a touch of luxury but also enhances the overall design, making it perfect for special occasions or as an everyday fashion piece.
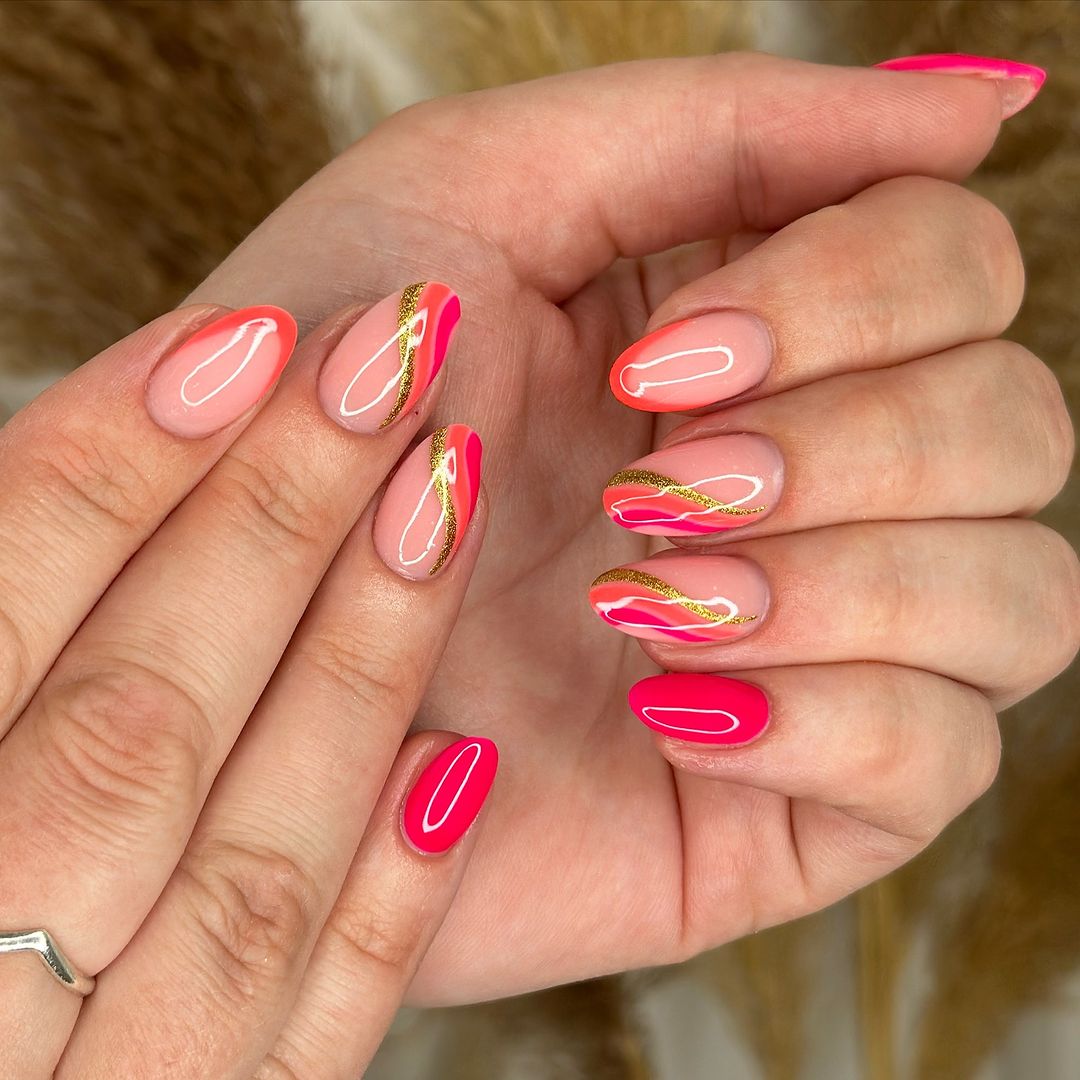 Photo credit by: @___beautybynicole
- Base Coat: CND Adhesive Base Coat
- Nail polishes: ‘Blush Pink’ by Chanel, ‘Neon Pink’ by OPI and ‘Metallic Gold’ for accents
- Fine brush: for detailed lines and swirls
- Top layer: INM Out The Door
Start with a base coat to ensure durability. Apply ‘Blush Pink’ as a base. Using a fine brush, draw intricate swirls using ‘Neon Pink’ and add highlights with ‘Metallic Gold’. Work carefully to make sure each line is precise and the colors blend subtly at the edges. Seal your artwork with a high-quality top coat for a long-lasting gloss finish and prevent chipping.
In conclusion, neon coral nails offer a vibrant and eye-catching way to up your manicure game. Whether you prefer bold designs or subtle accents, the electrifying hue of neon coral adds a fun pop of color to any look. With endless possibilities for creativity and expression, embracing neon coral nails is sure to brighten your style and leave a lasting impression. So, dive into this dynamic trend and let your nails shine with the stunning charm of neon coral.
copied URL